
A guide to how our Product Builder map printing system works.
Learn how our Product Builder works
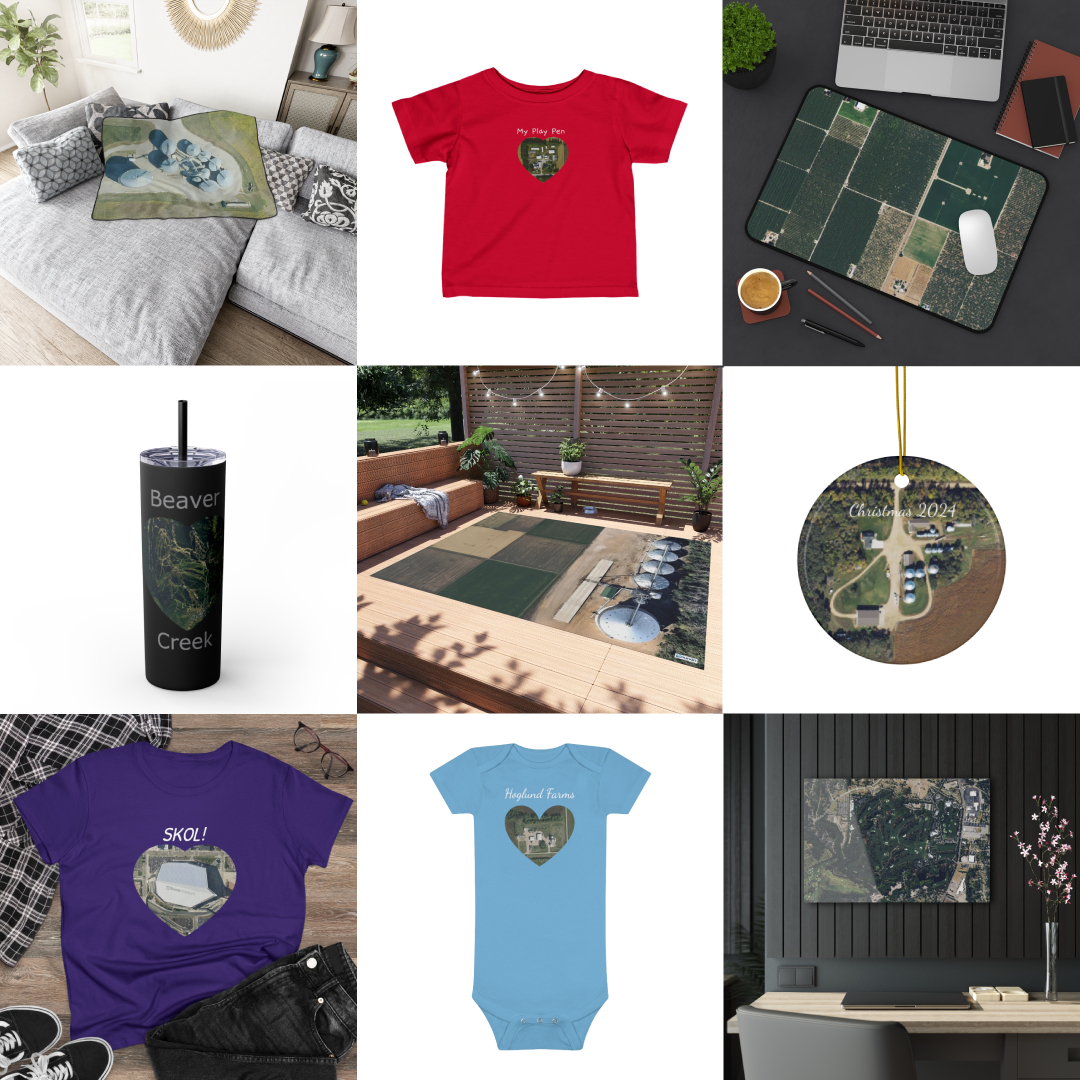
Our new mapping system was built to help you as a customer create your own unique printed mapped product from maps we provide while also allowing you to upload your own pictures so you get exactly what you want in a few minutes. Scroll down to go through a step by step guide or watch the videos below.
Note:
It works best on Desktop/Laptop/Tablet web browsers currently.
Mobile browsers can work, but we are still configuring it.
Pick what you want printed
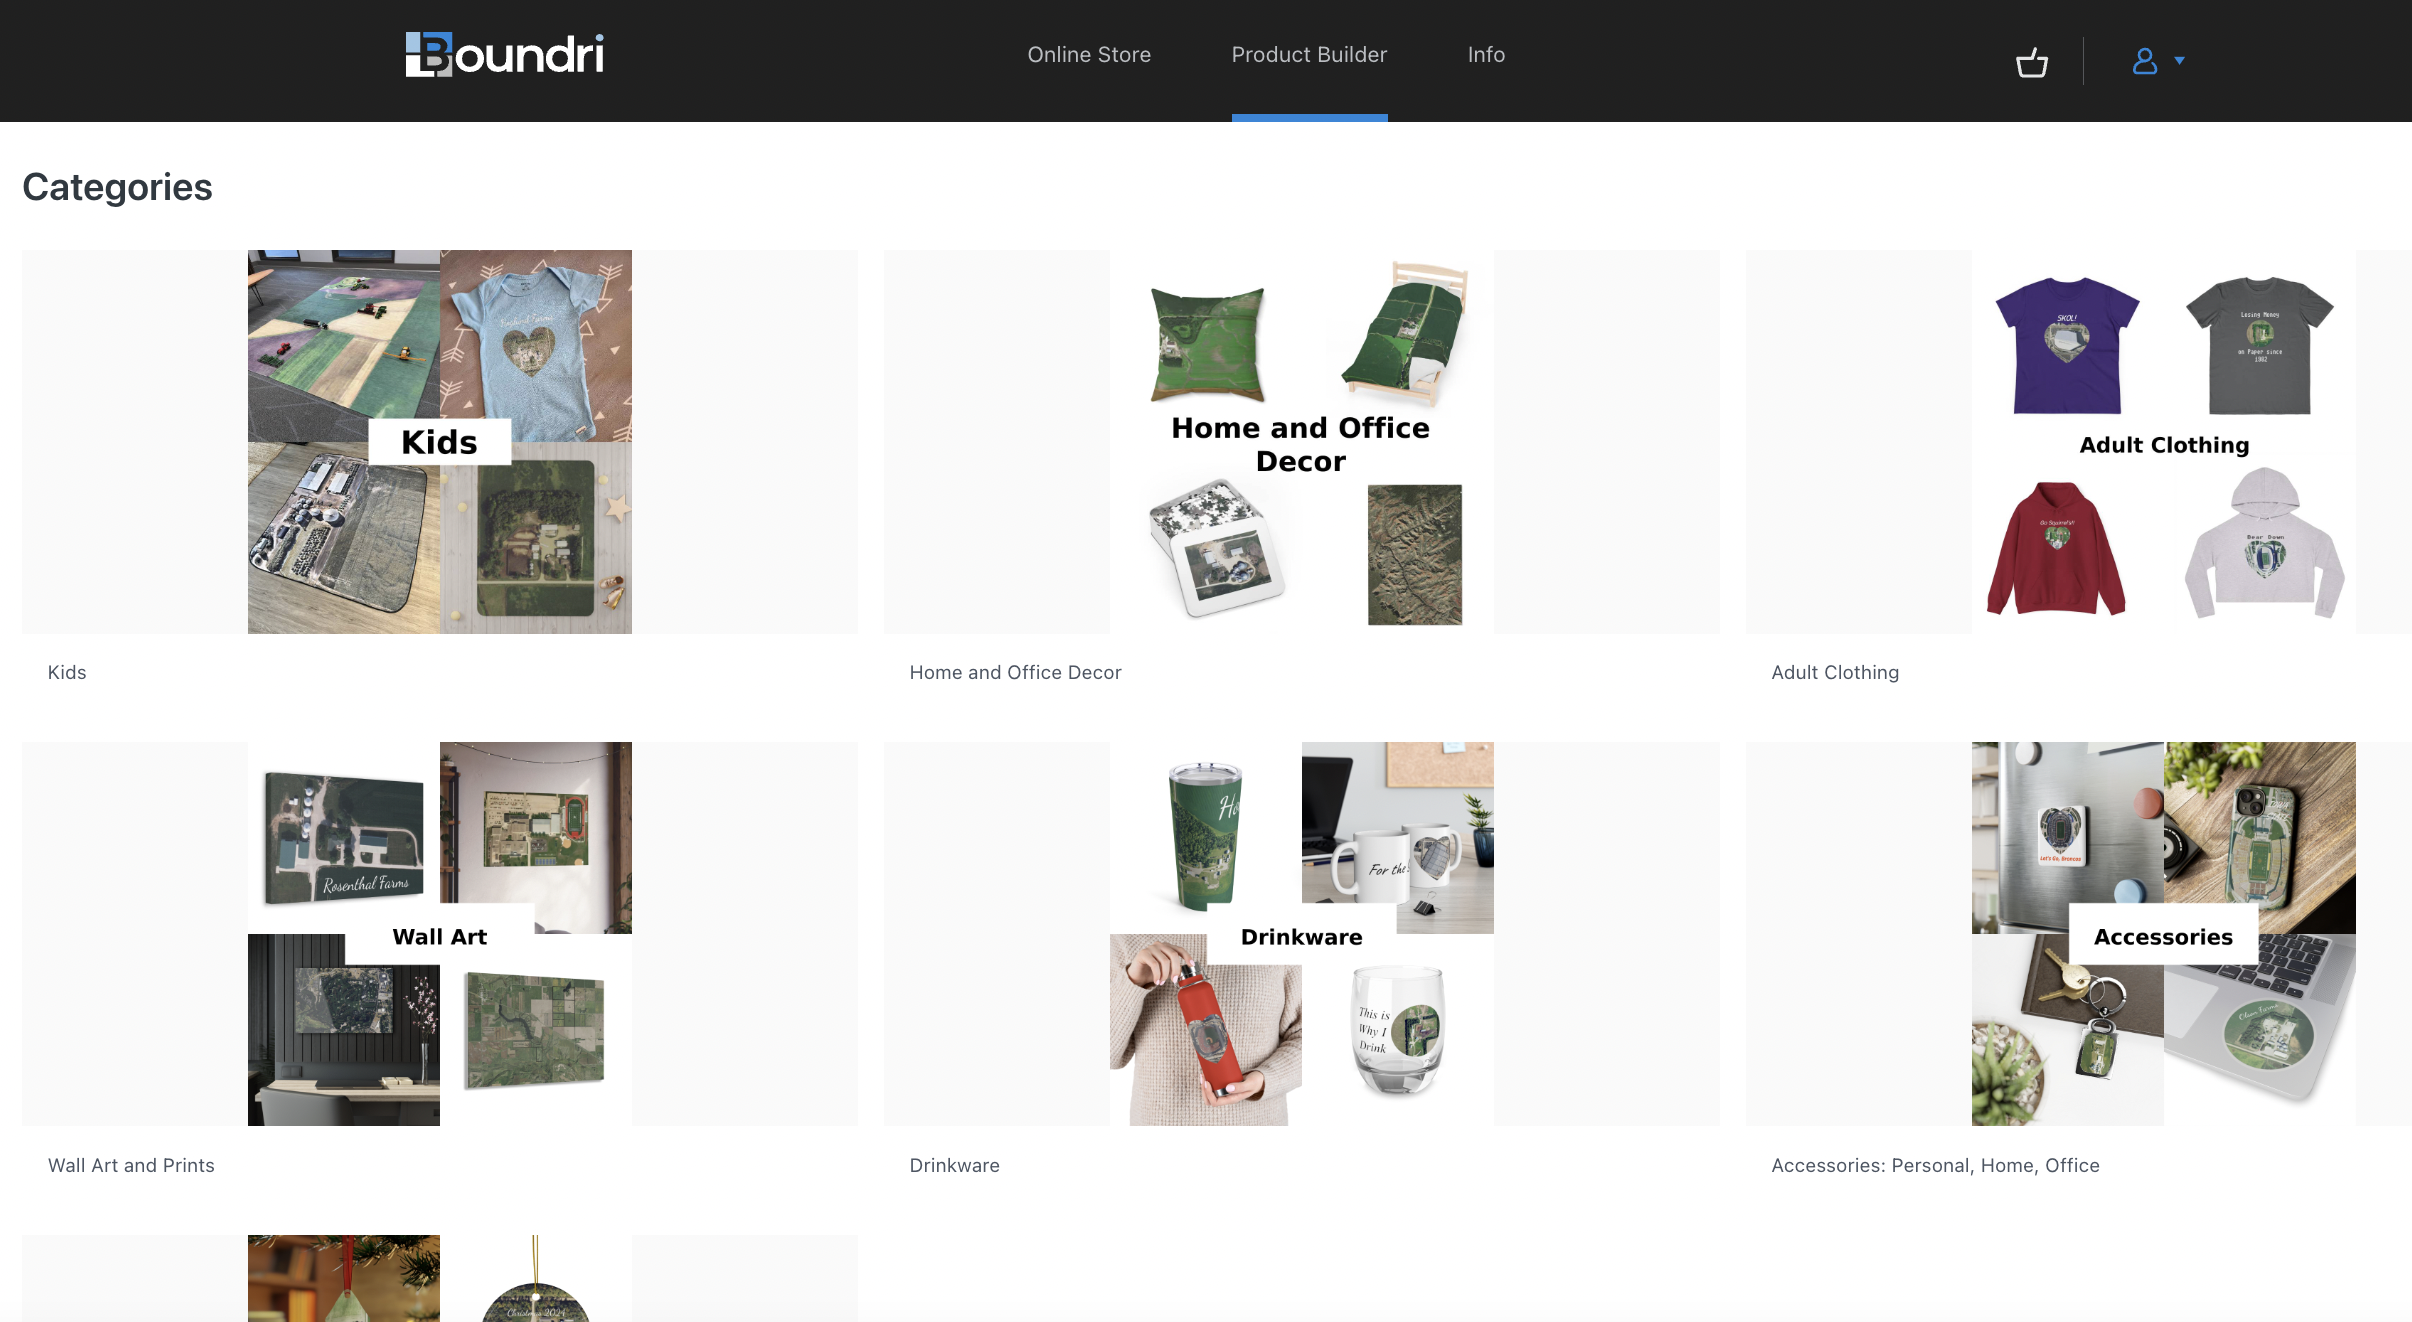
We have many different main categories to choose from from Kids Items, Home and Office Decor, Adult Clothing, Drinkware, Accesorries, and Holiday products.
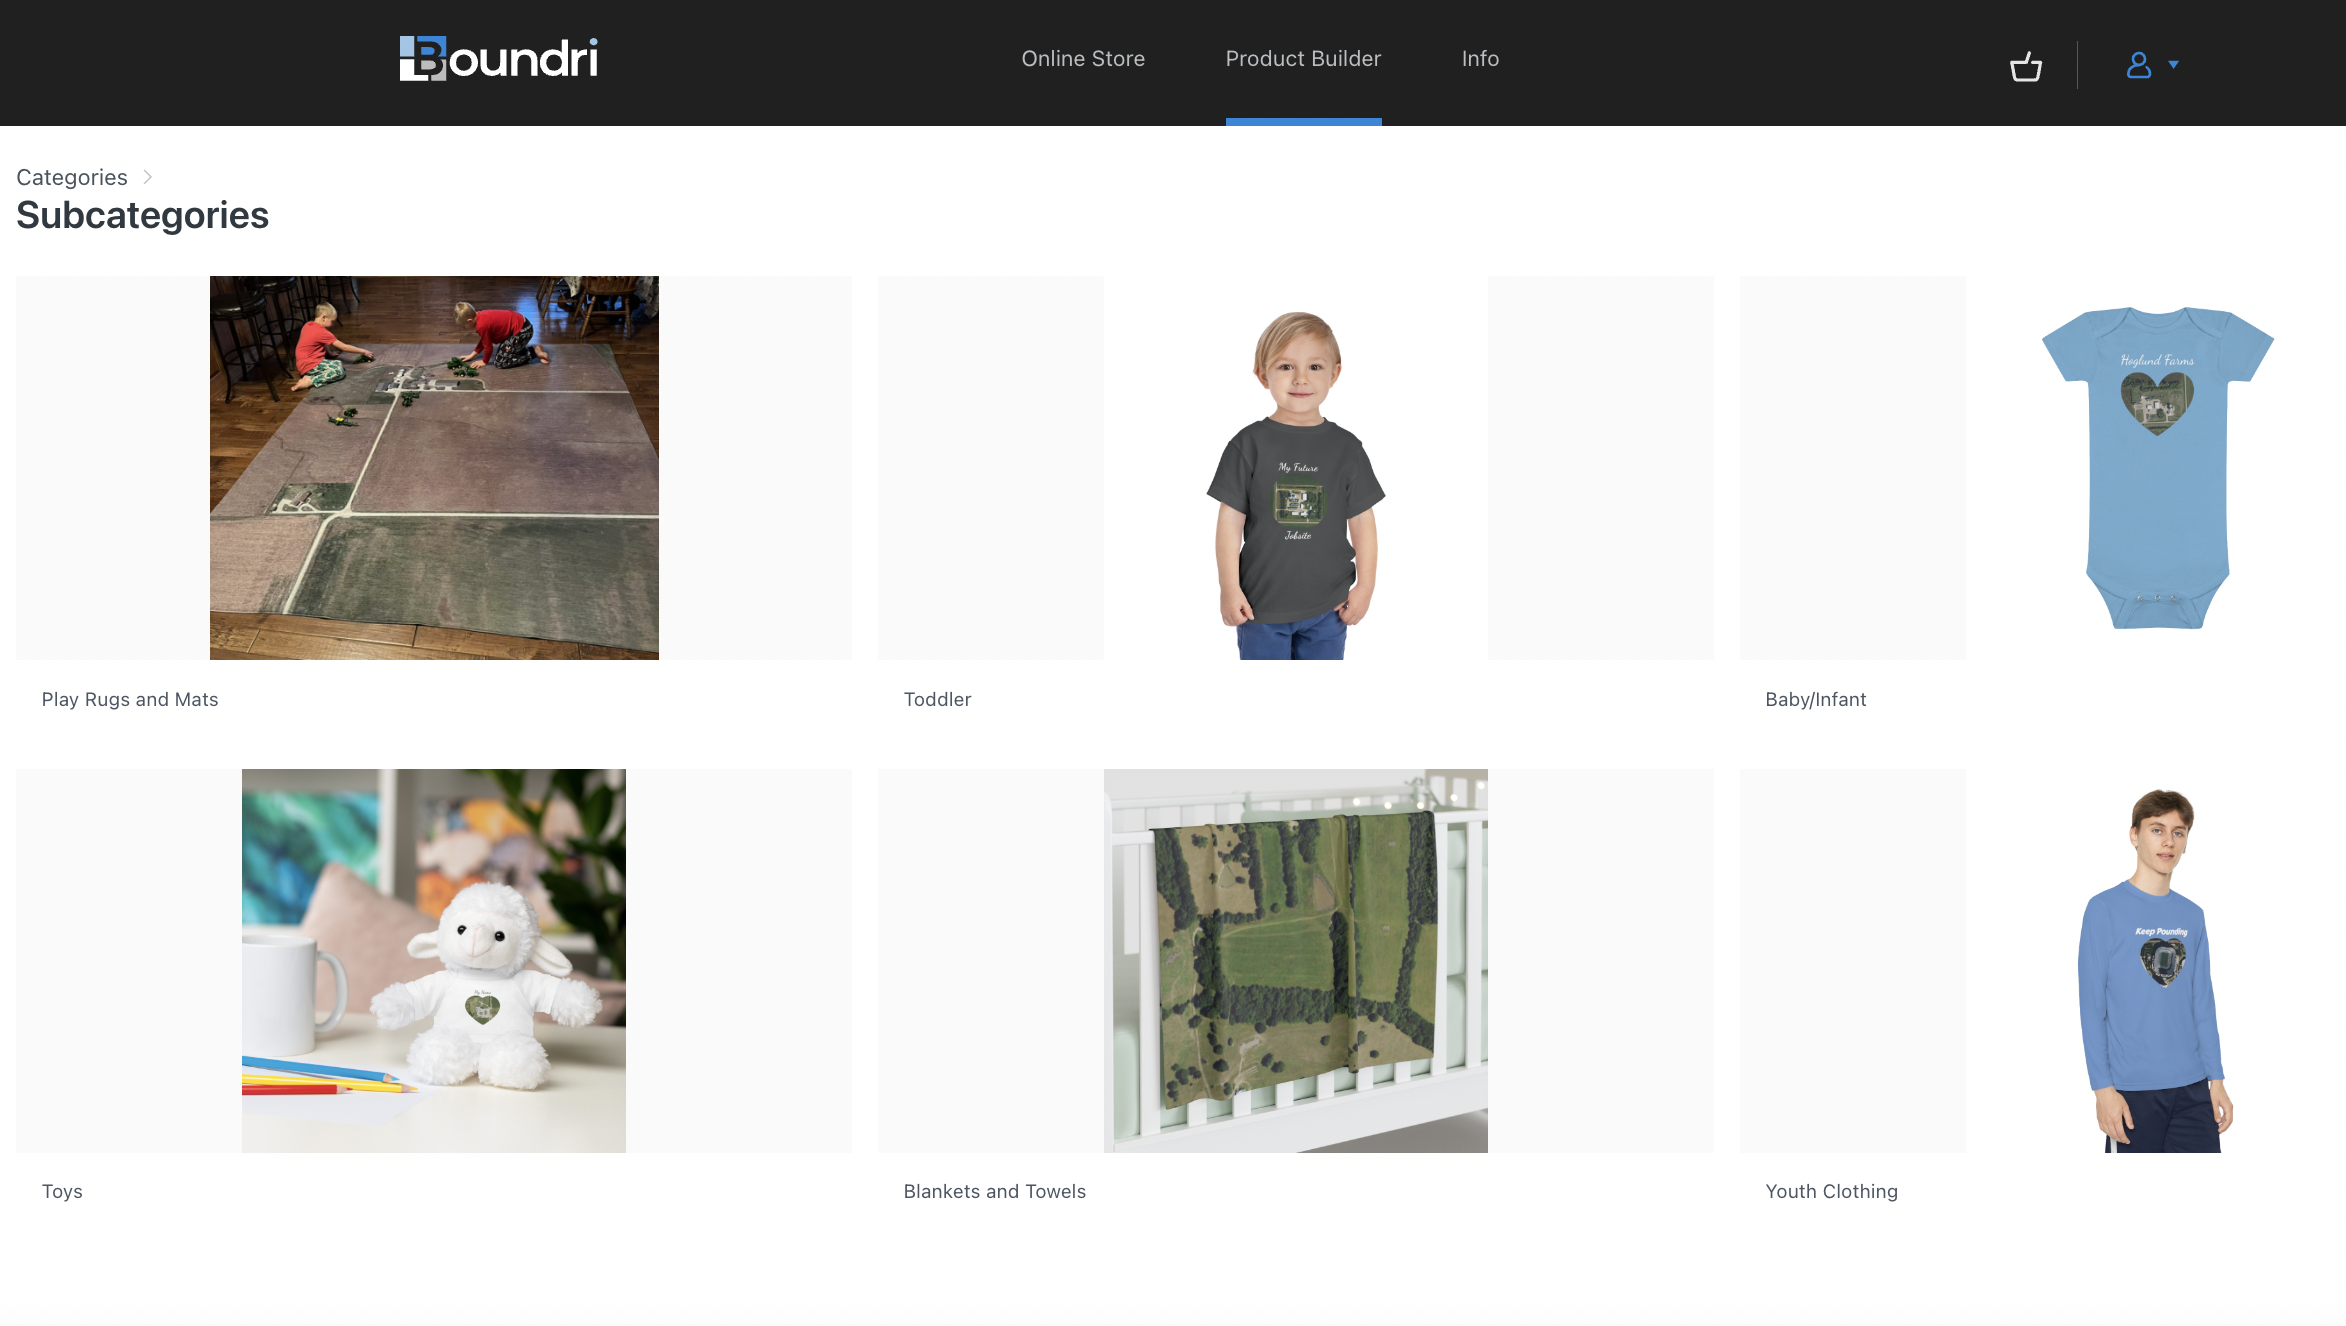
- There are other Sub-Categories as well to dive deeper into different variances within the main Categories.
- Each Sub-Category has many different Products within it and we are always adding new ones and options for the best experience.
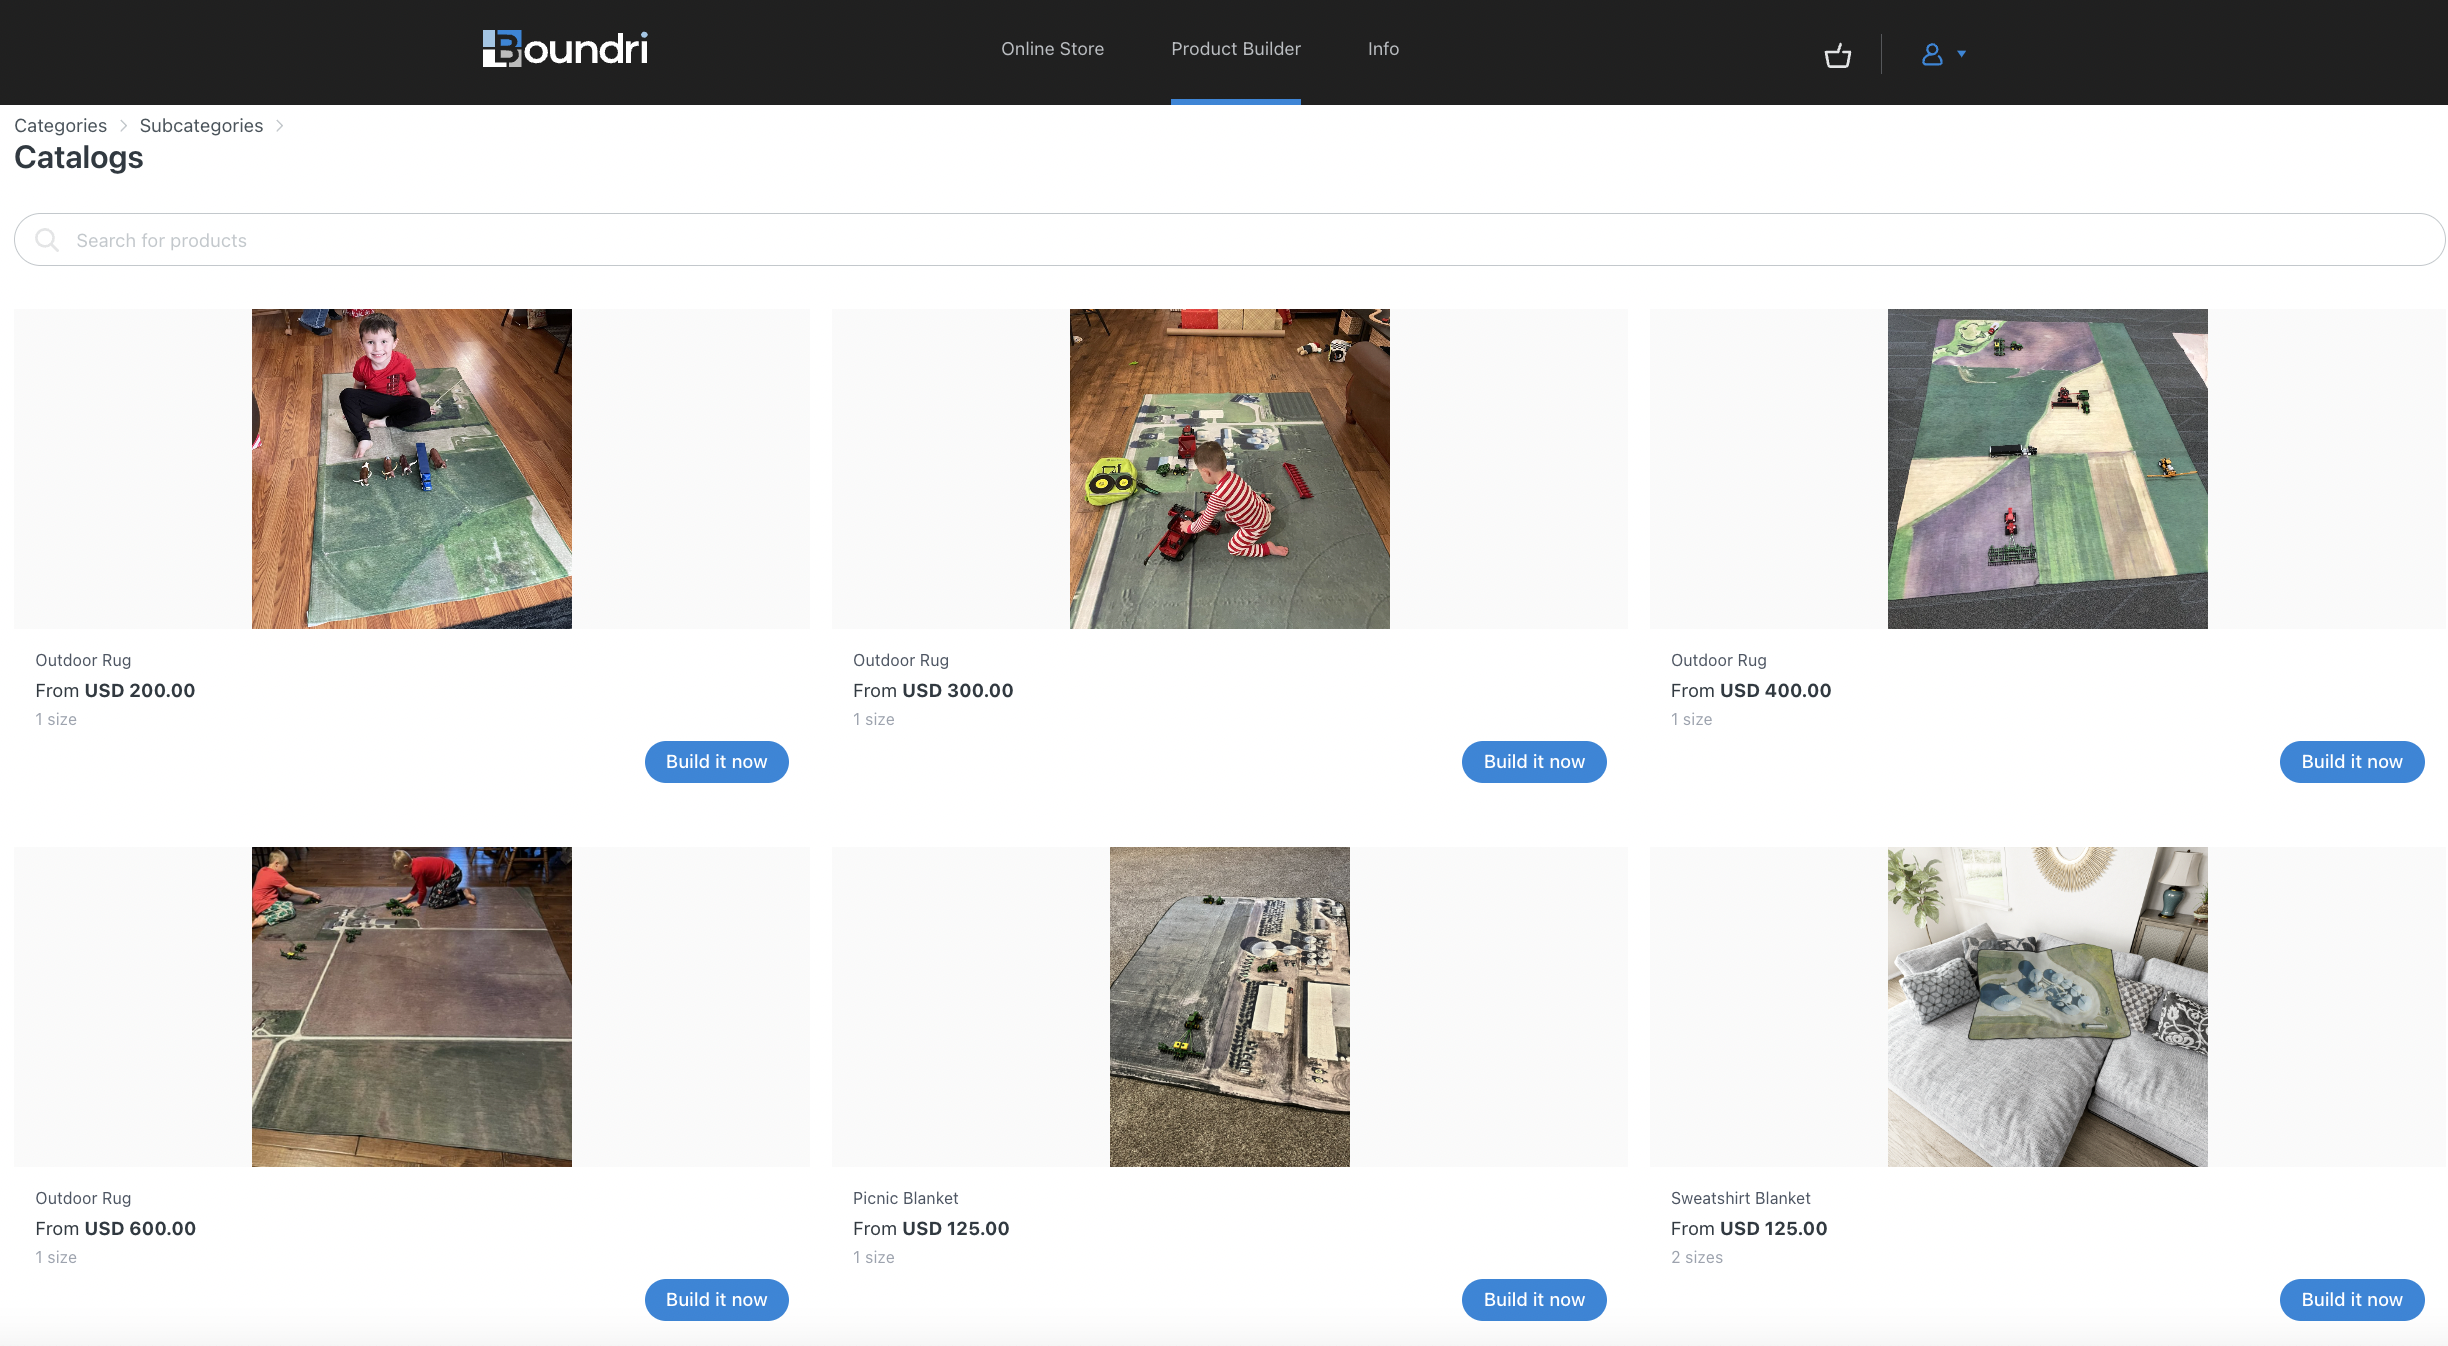
- Once you know what you want, hit Build It Now and then go further and find pricing and other product options along with mockups and examples.
- Hit Build It Now again and get to the main Product Builder mapping page to create exactly what you want.

Pick what you want printed
We have many different main categories to choose from from Kids Items, Home and Office Decor, Adult Clothing, Drinkware, Accesorries, and Holiday products.
- There are other Sub-Categories as well to dive deeper into different variances within the main Categories.
- Each Sub-Category has many different Products within it and we are always adding new ones and options for the best experience.
- Once you know what you want, hit Build It Now and then go further and find pricing and other product options along with mockups and examples.
- Hit Build It Now again and get to the main Product Builder mapping page to create exactly what you want.
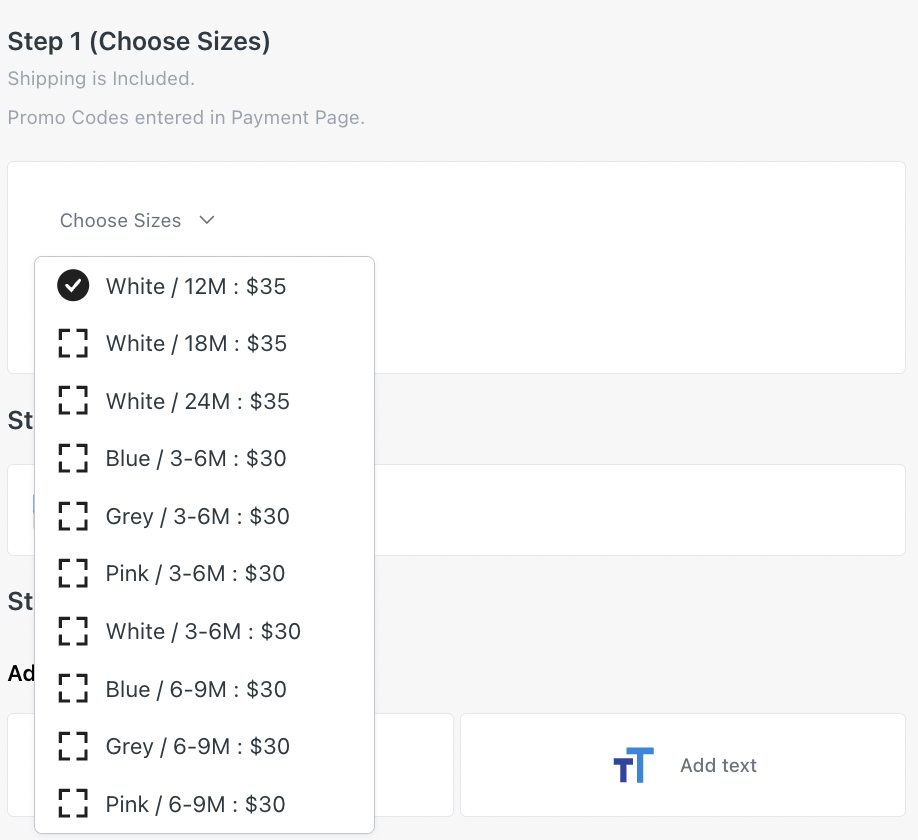
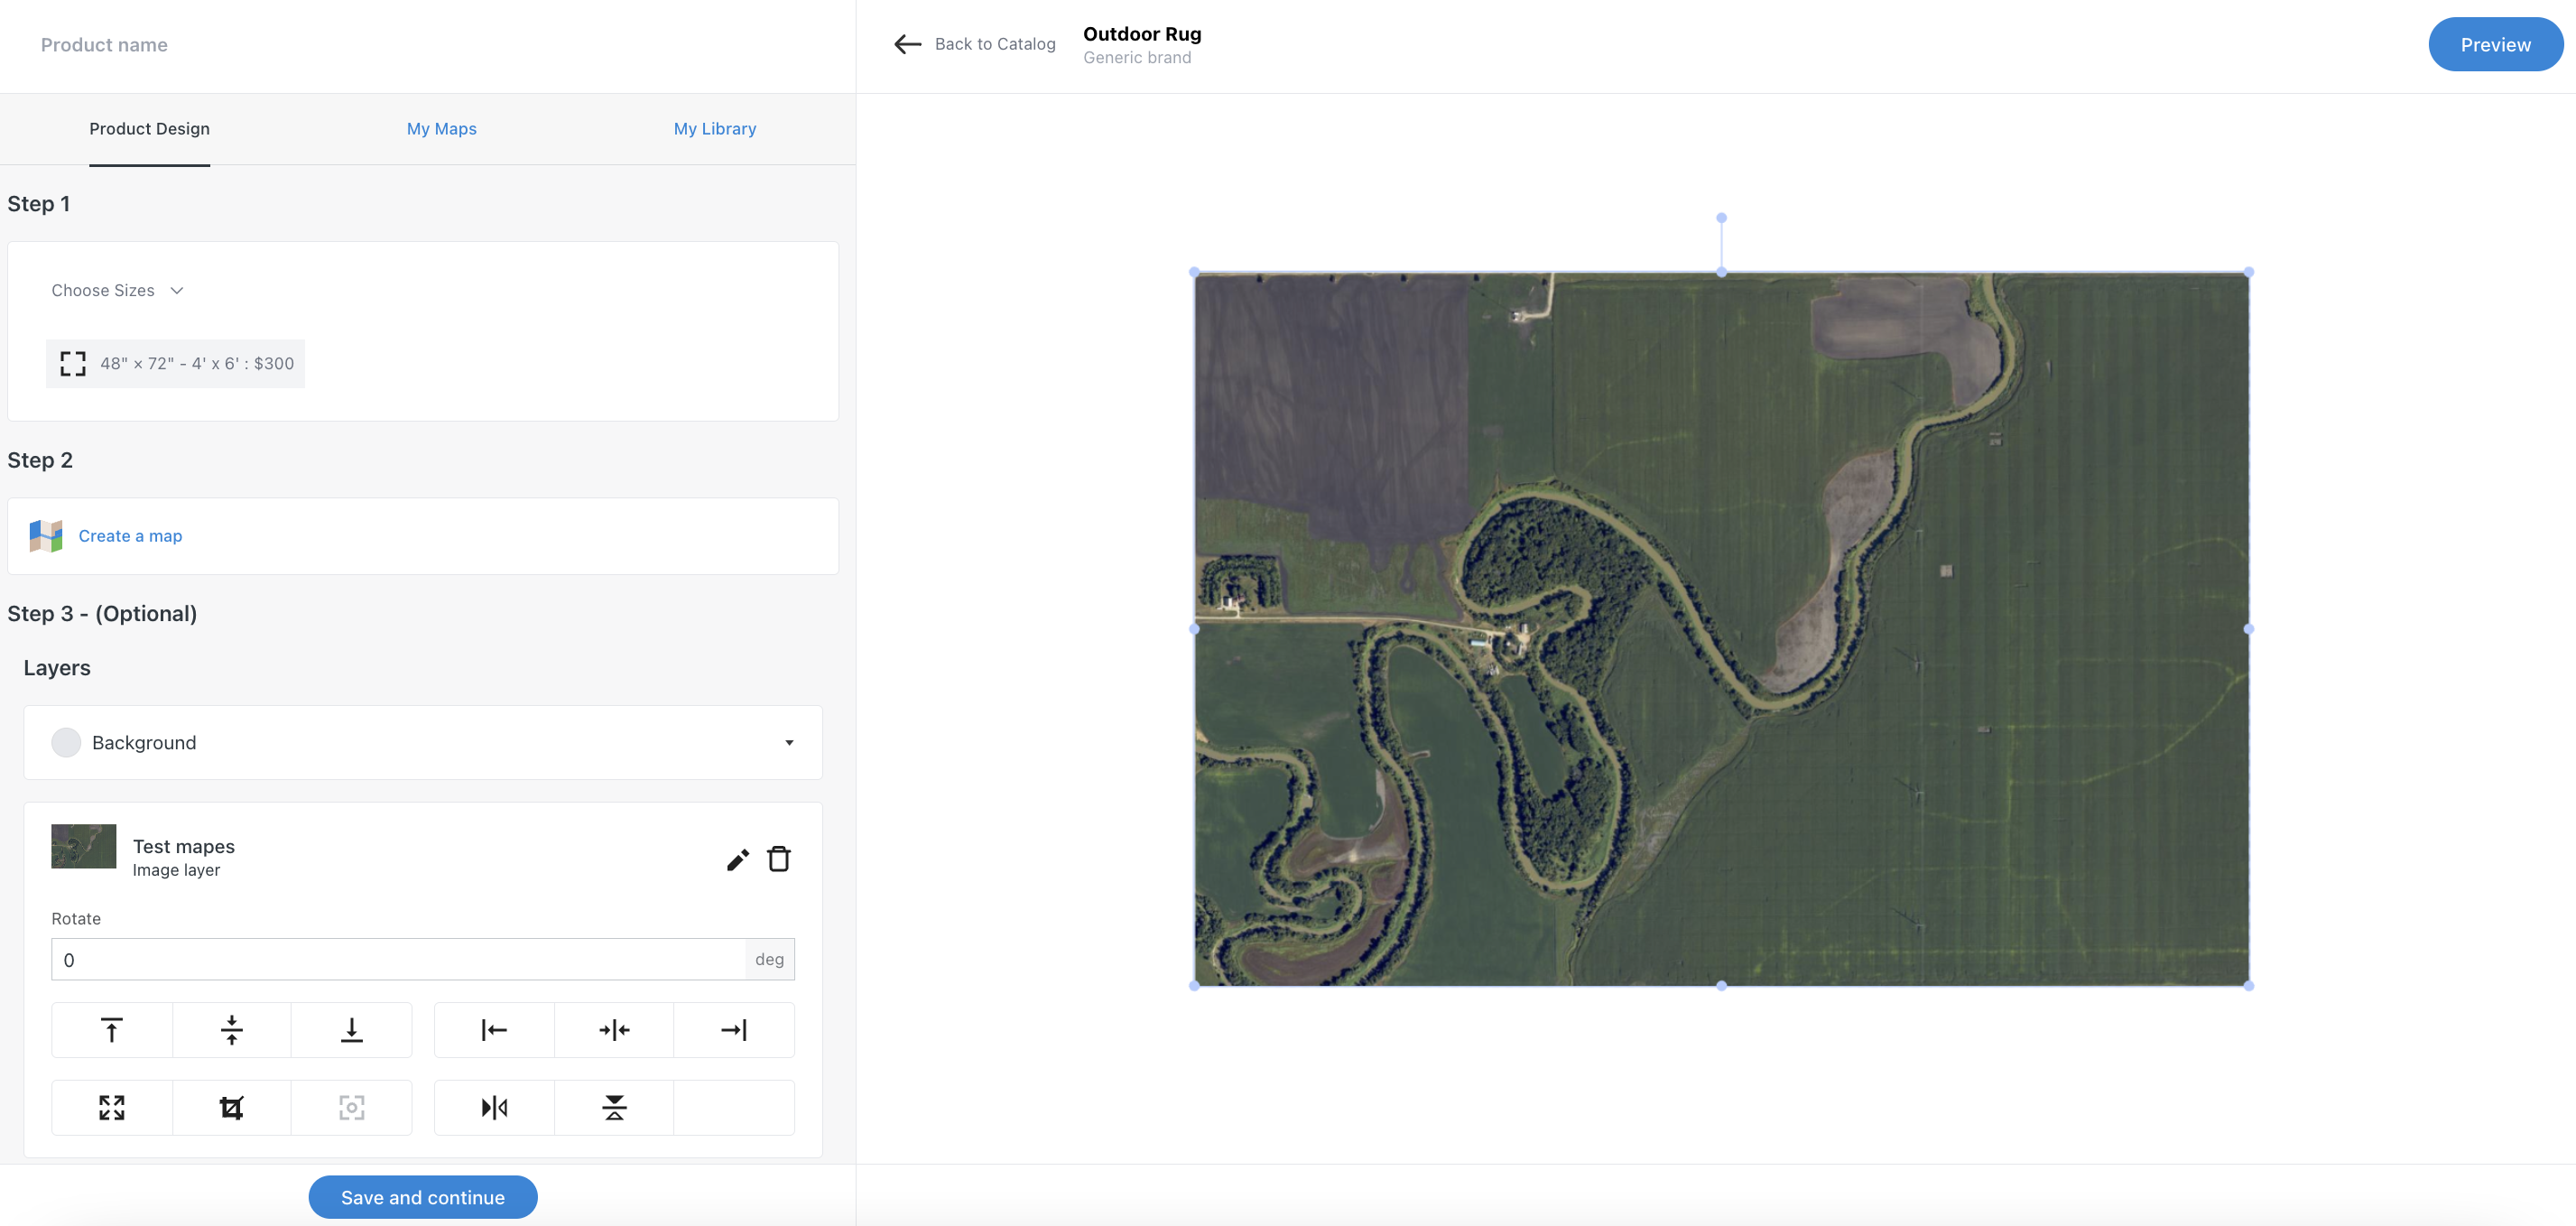
Choose the product size and price
Once you select the product you'd like to print, you'll go to our main Canvas editing page. Here you'll see 3 steps to complete. The 1st step is to simply select the size you want with it's corresponding retail price. (note: if you have a discout promo code you'll be able to add this later)
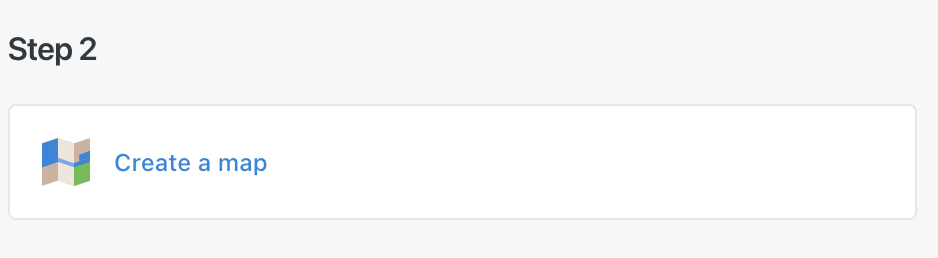
Create a Map
You have you product size picked, now lets start mapping away. Simply select this next button and you'll be then guided to our Main Map Window
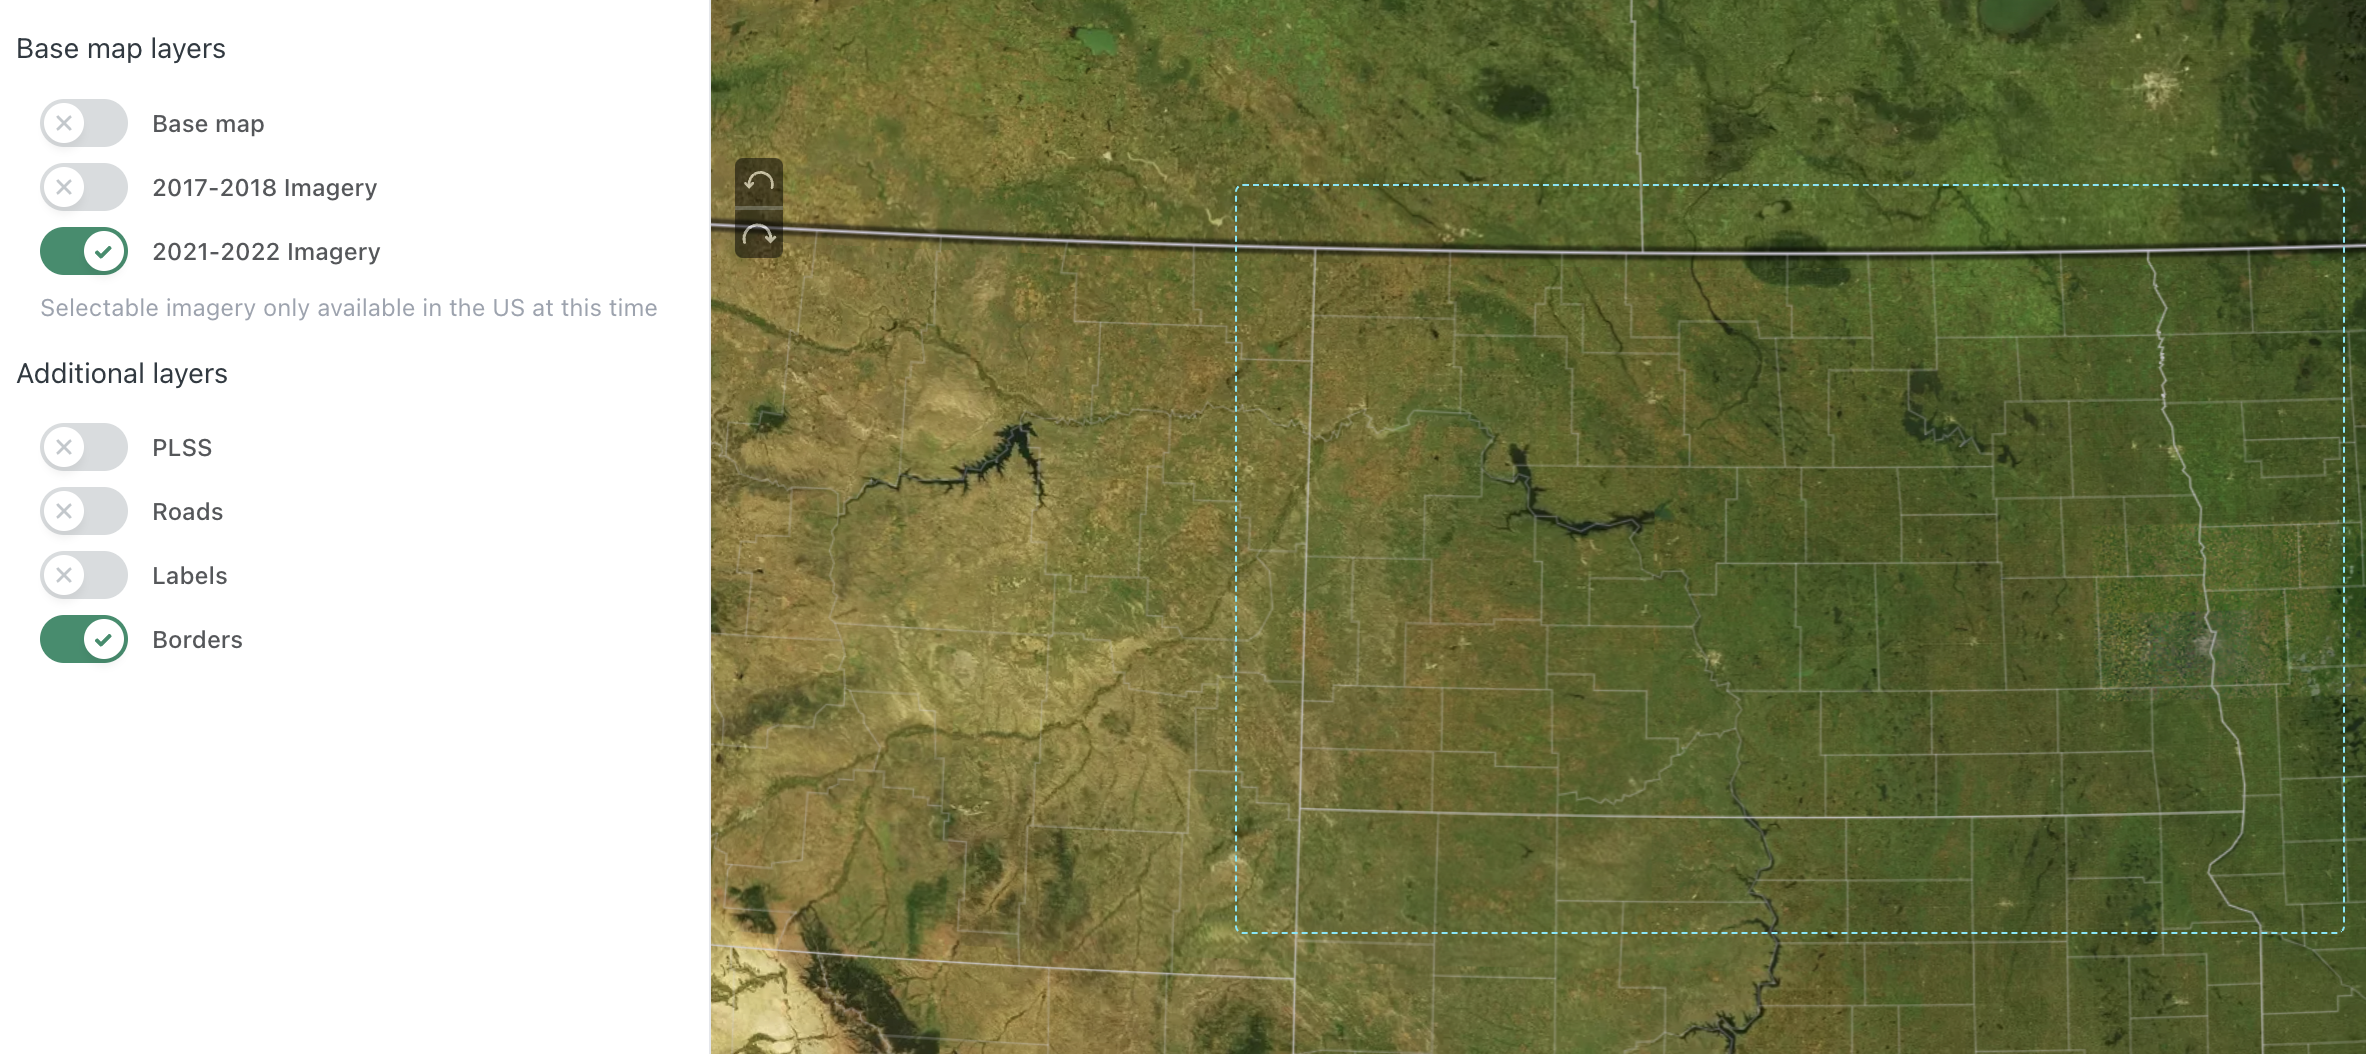
The Main Map
Step 2 brings you to our map window that has plenty of options to help you find where you want to go with multiple toggles to choose from for different map layers to add.
Make sure you have certain Layers off that you don't want to print.
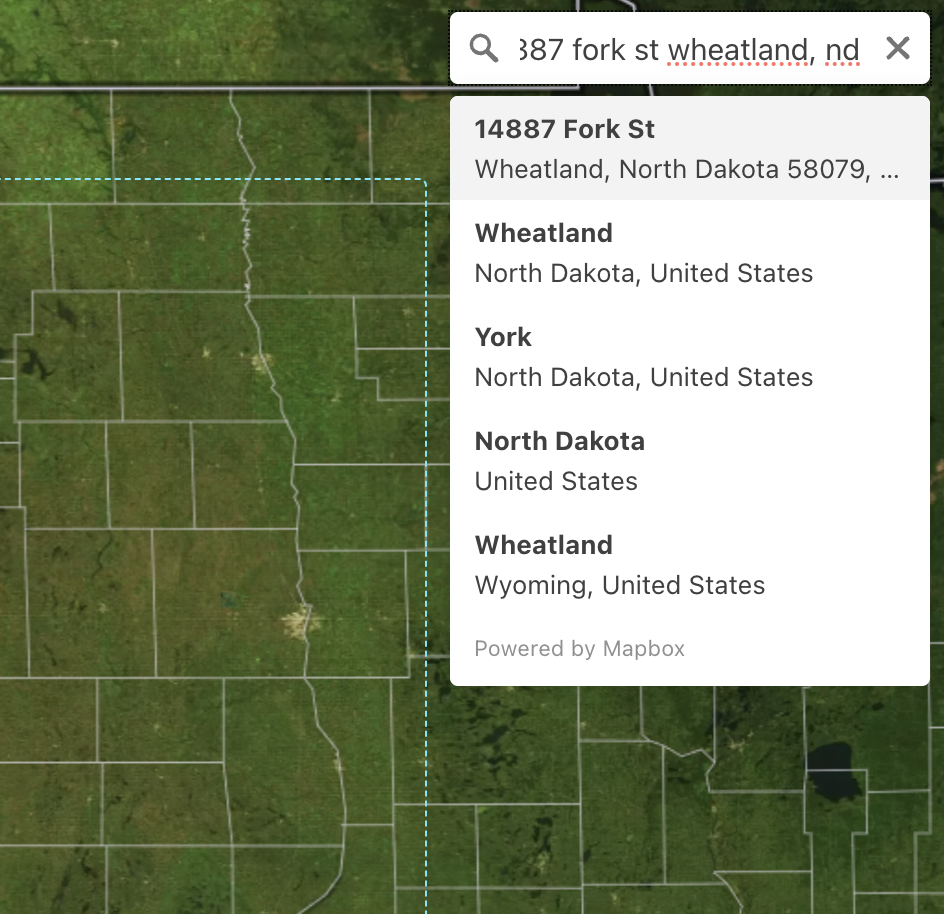
Zoom, Address or GPS point search
Much like any other popular mapping system you can simply add in your address of known GPS points for the map to zoom into the area you want. Also, you can just scroll and zoom down and pan and drag with you mouse as you want. There is even in the upper right area of the map and area you can rotate the map as you want.
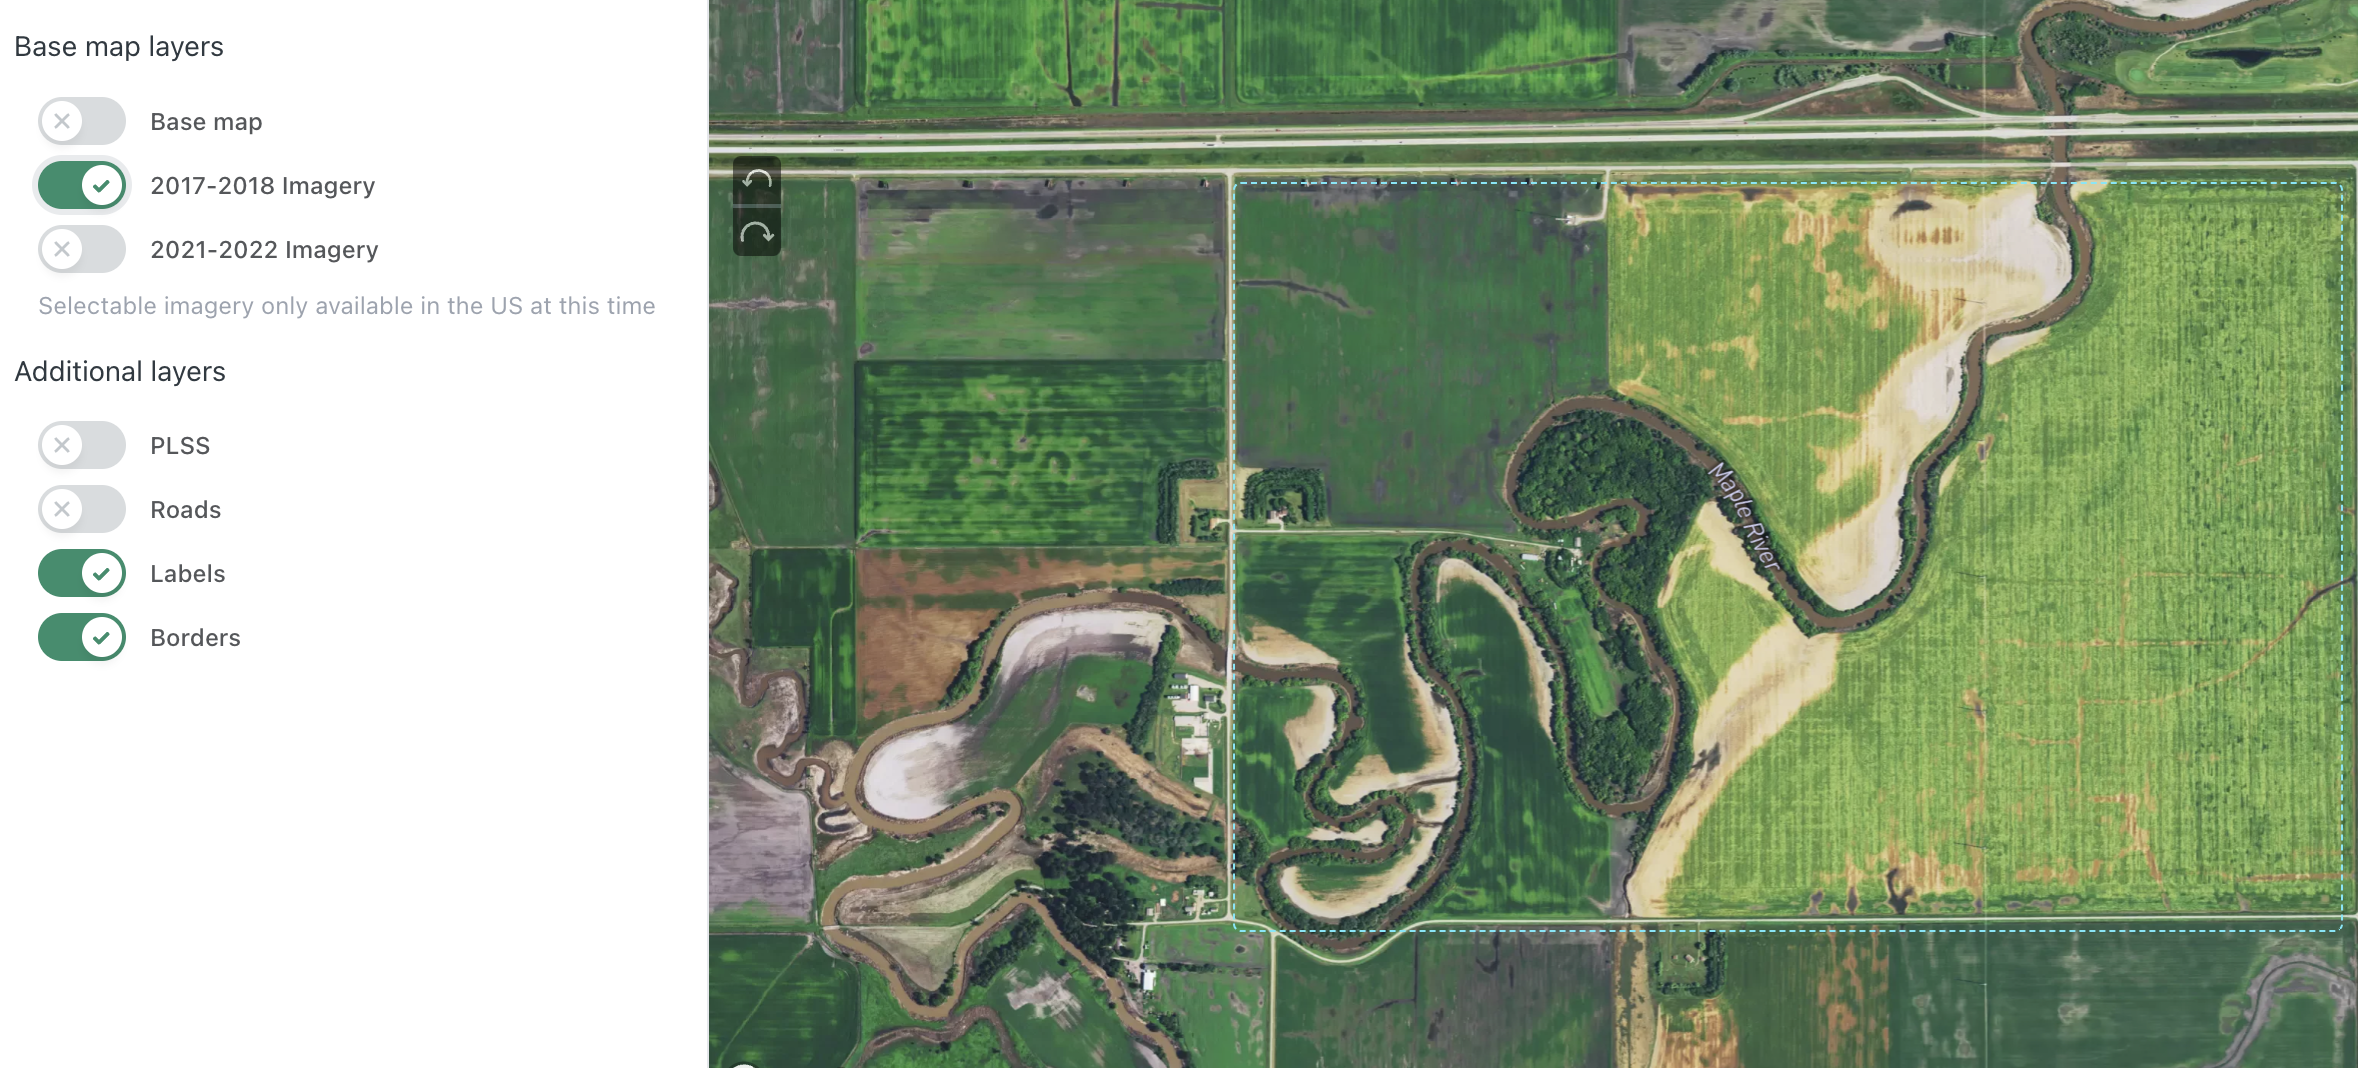
Choose Different Map Images
We know that not all images will work for what you'd like and that's why we are providing mulitiple image options with more to come
Top Image: The Base Layer - This image layer isn't from any particular year, but is the only layer that covers the entire globe. This is the only layer currently available for our Non-US customers.
- As a note: This layer does have higher resolution imagery around certain urban areas if you zoom in close enough.
Middle Image: 2017-2018 Layer - This layer (only in the US) is a mix of years that come from the USDA National Agriculture Imagery Layer or NAIP. It will vary from place to place, but is a fairly vivid layer.
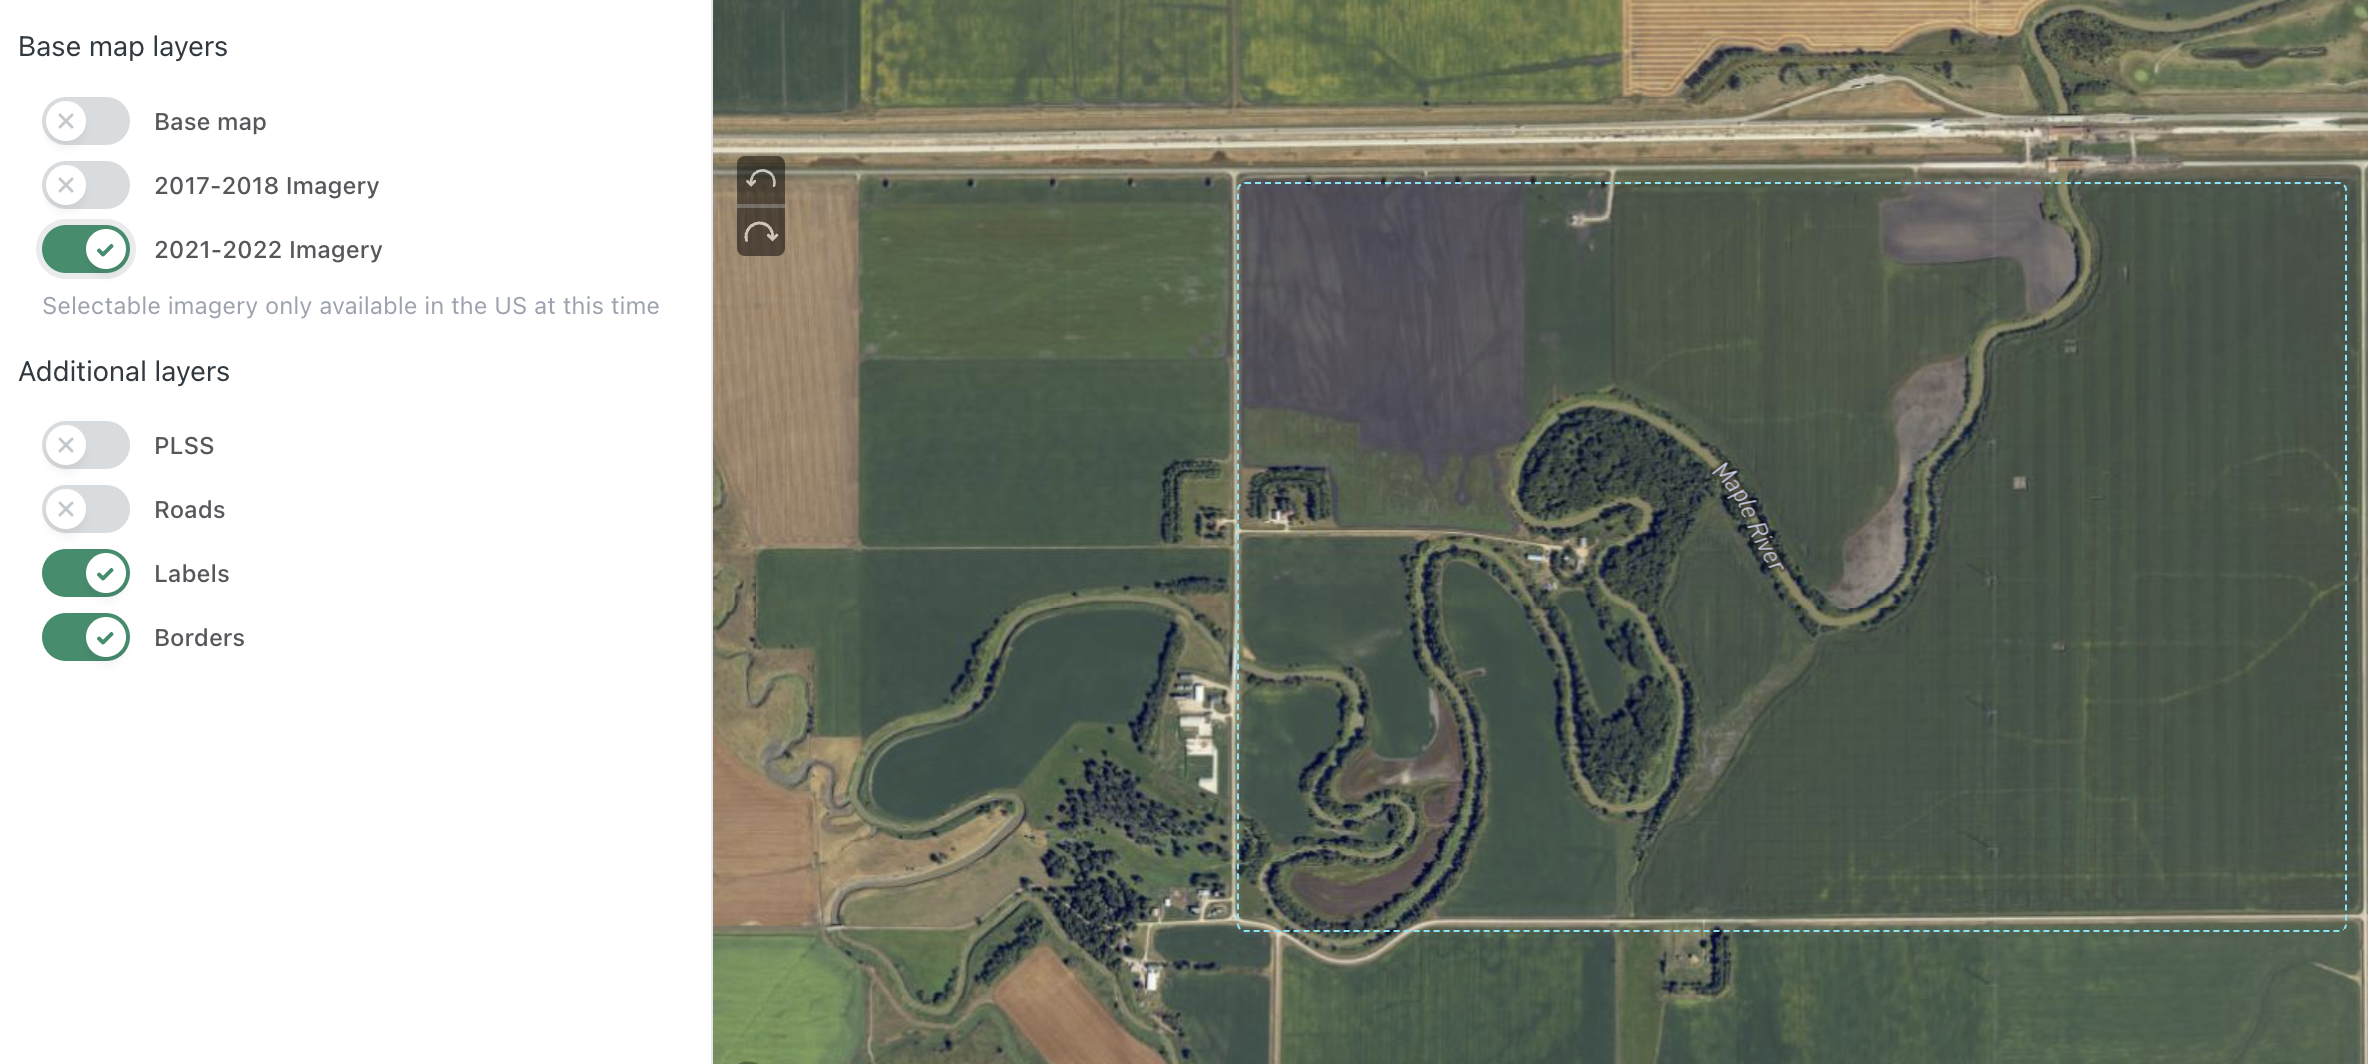
Bottom Image: 2022-2023/24 Layer - This layer (only in the US) comes from the USDA National Agriculture Imagery Layer or NAIP. It will vary from place to place, but is a fairly vivid layer. At times it can load a little slower so be patient with lower internet speed.
Note: If you are looking for more updated or better imagery we can at times provide that, but it needs to be requested at this time. Just contact us directly with these requests. We are always working to integrate directly better imagery.

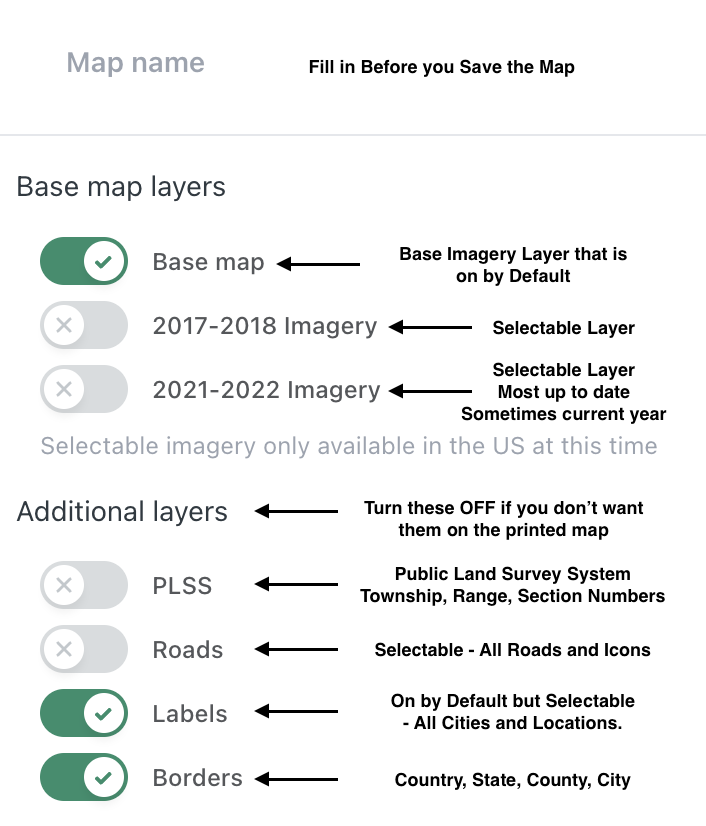
More on Map Layers
We just reviewed the Base Map Layers in detail, but there are other layers shown on the left side of our mapping system. Note: These layers will show up on your printed product if they are turned ON.
- PLSS or Public Land Survey System is a layer that shows the Township, Range, and Section numbers
- Roads will show all the road names and icons
- Labels will show names of cities, buildings, and other structures
- Borders will show Country, State, County, and City boundaries
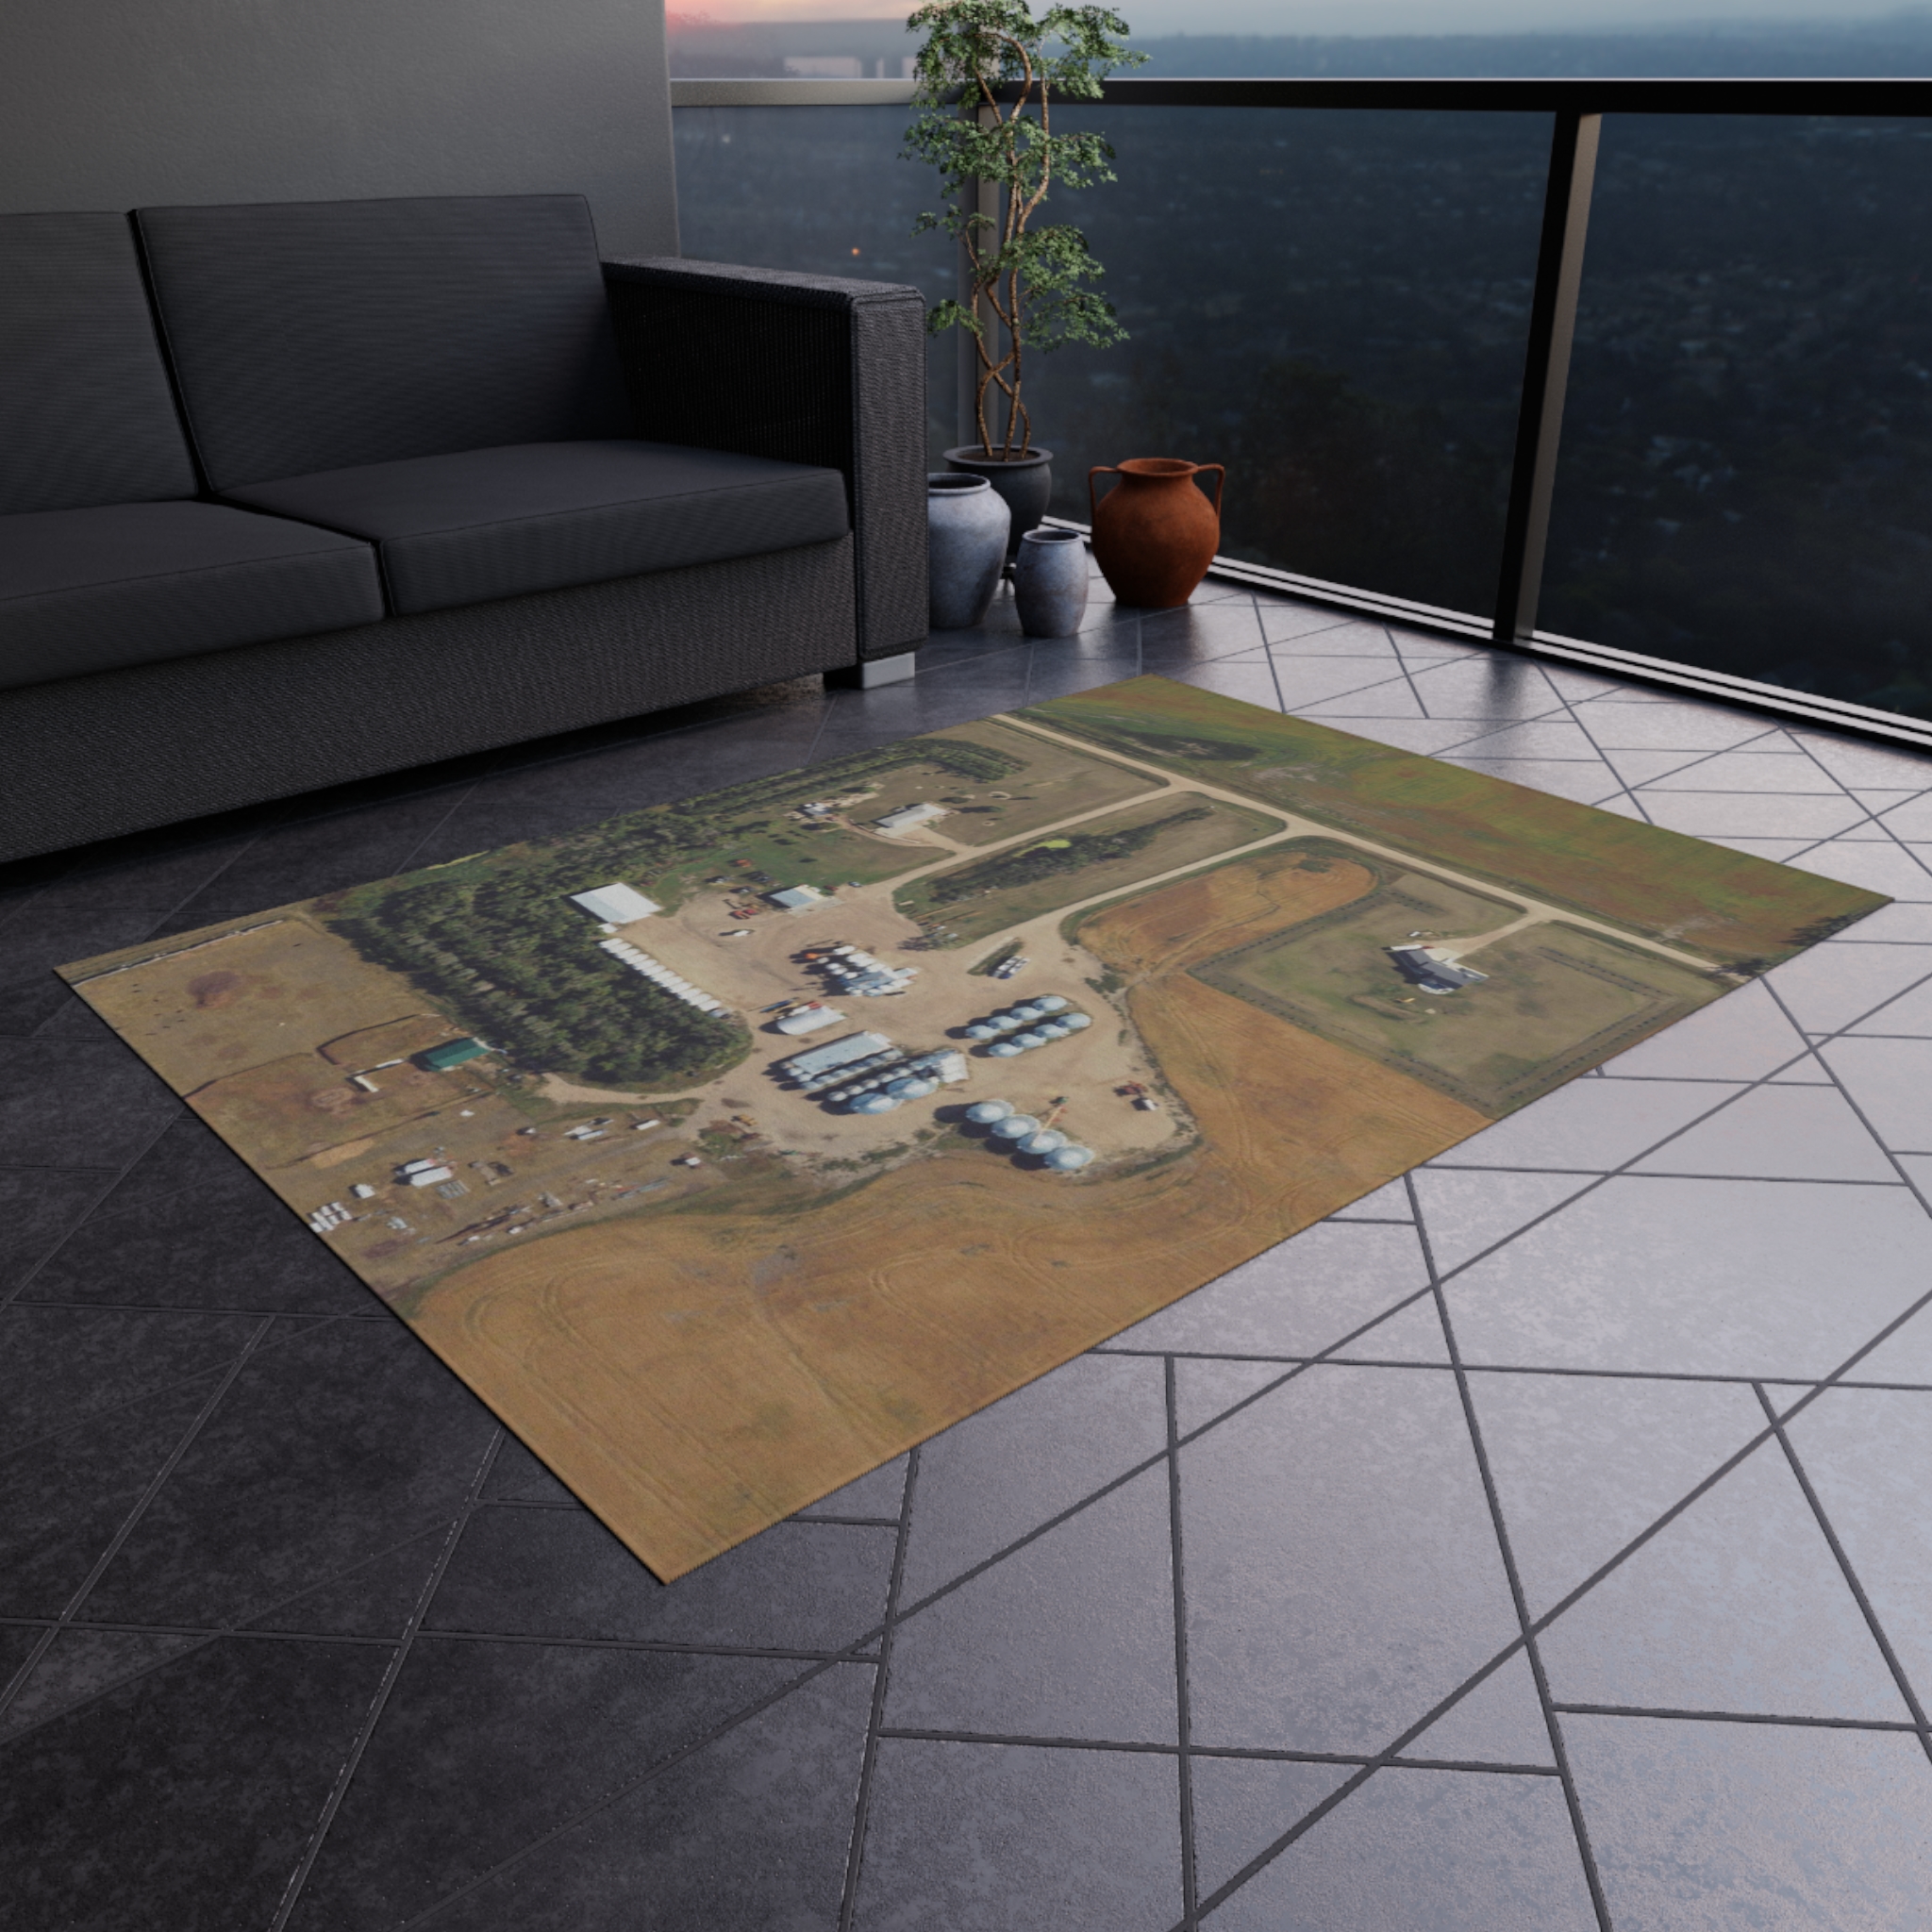
Save Map to Canvas
The map viewer will show the outline of the product size as a dotted line (can be turned on and off as needed) and once you Name and Save the map it will clip the image out from the map and bring it back to the Main Canvas Page to edit further.
My Maps - Will show the maps you have saved. You can choose multiple on the same canvas to print if you'd like
My Layers - Are the uploaded images you brought in to use
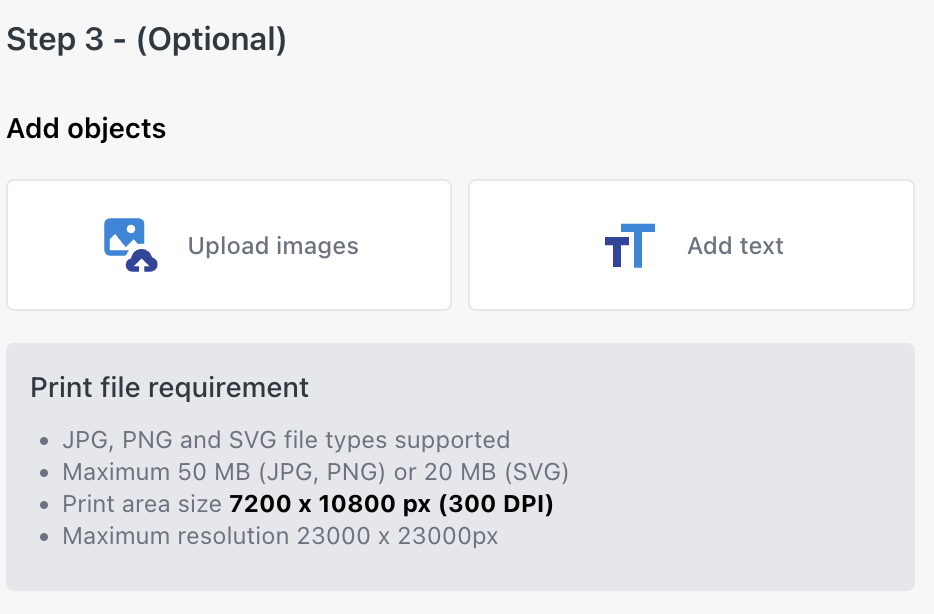
Edit with Optional Tools
If you'd like to add something extra to the map like your own image or text you can do that by selecting one of these options. You can even use the Upload Images option to add your own map if you have something already like from a drone.
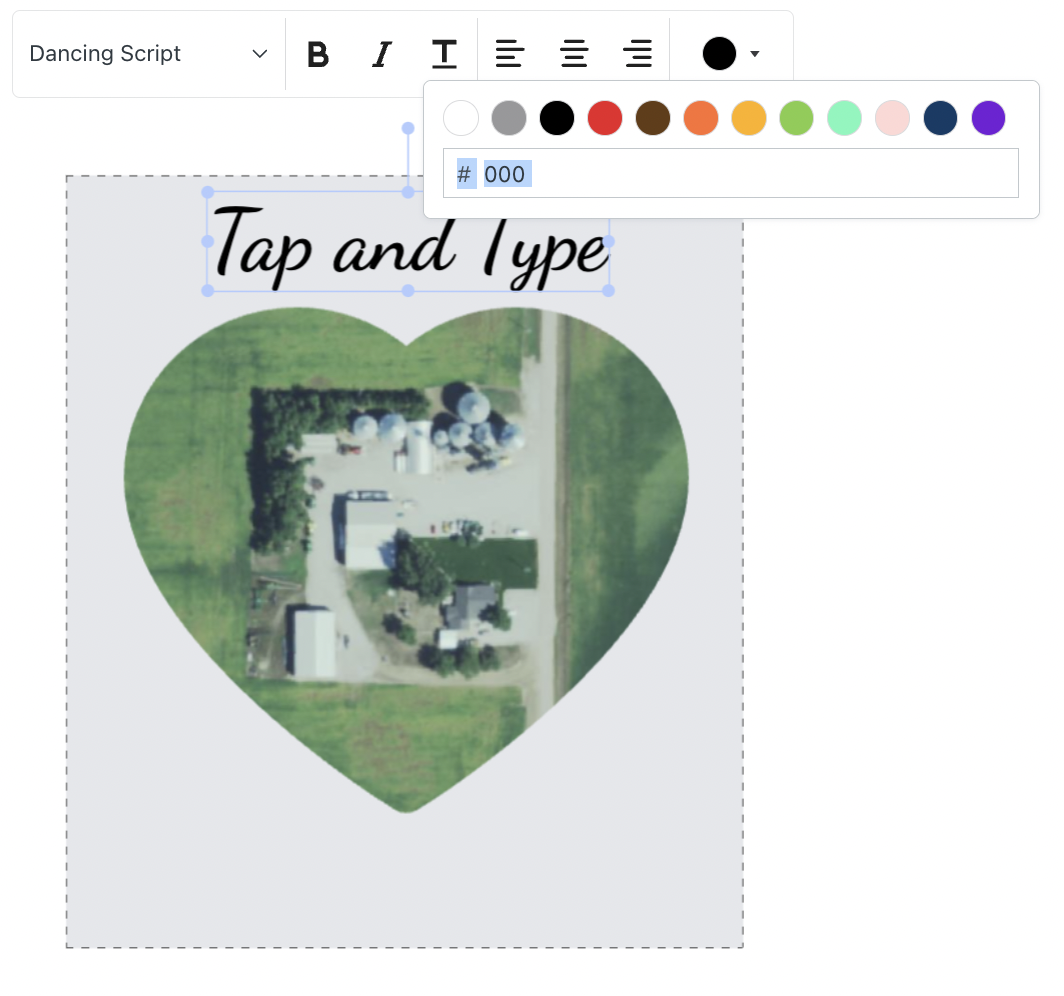
If you select text, another window will pop up with font and color options. Pull or push the text box to change the font size
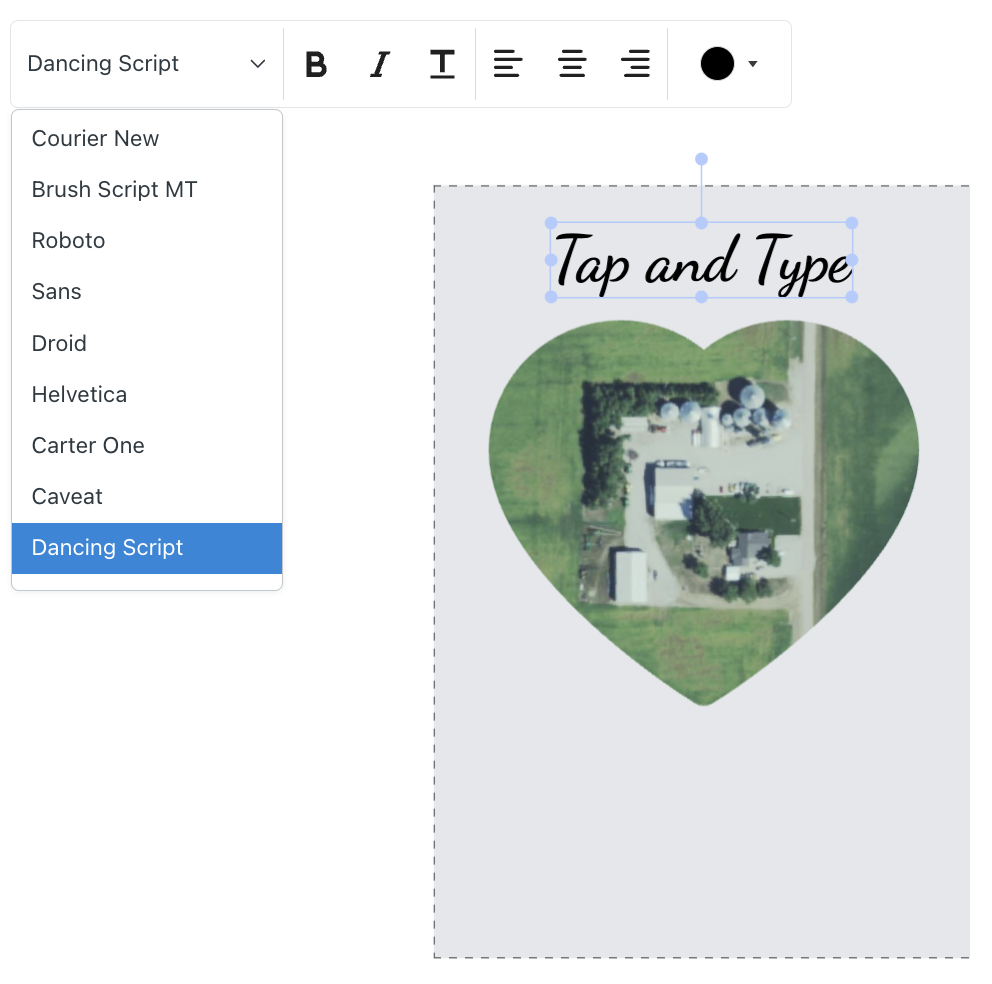
Add and Edit Custom Text
Once you hit the Add Text option these option on the left will show up.
- Pick from various fonts and change them with other typical text options you see in other word document editing systems. As a note: The Dancing Script font is the best option for a Handwritten option.
- Use your mouse to change the size and position of the text or even angle where and how you want it. Make sure to play around a little while also keeping withing the bounds of the print area.
- Different product will require different positioning so make sure you understand how it'll look by using the Preview button to get it exactly where you want it.
- Use the current color options or add your own custom color code as you want. Sometimes a simple Google search of a specific color code is the best way to find exactly what you want.
- Make it your own is the main point here. As always if you make a mistake, just redo it.
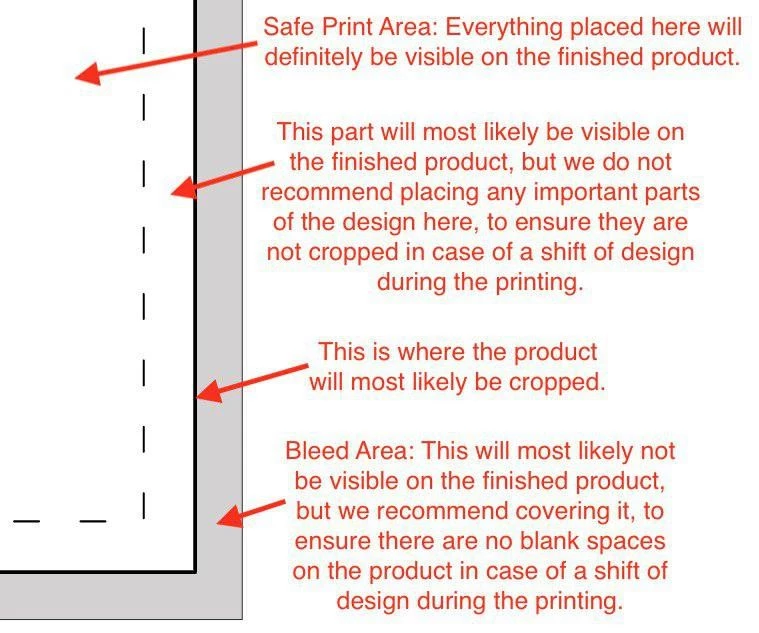
Important Note!! - Keep all text or uploaded images away from the edge of most products. There is a buffer on all edges so make sure to preview how it would be printed. The further away from the edge the better.
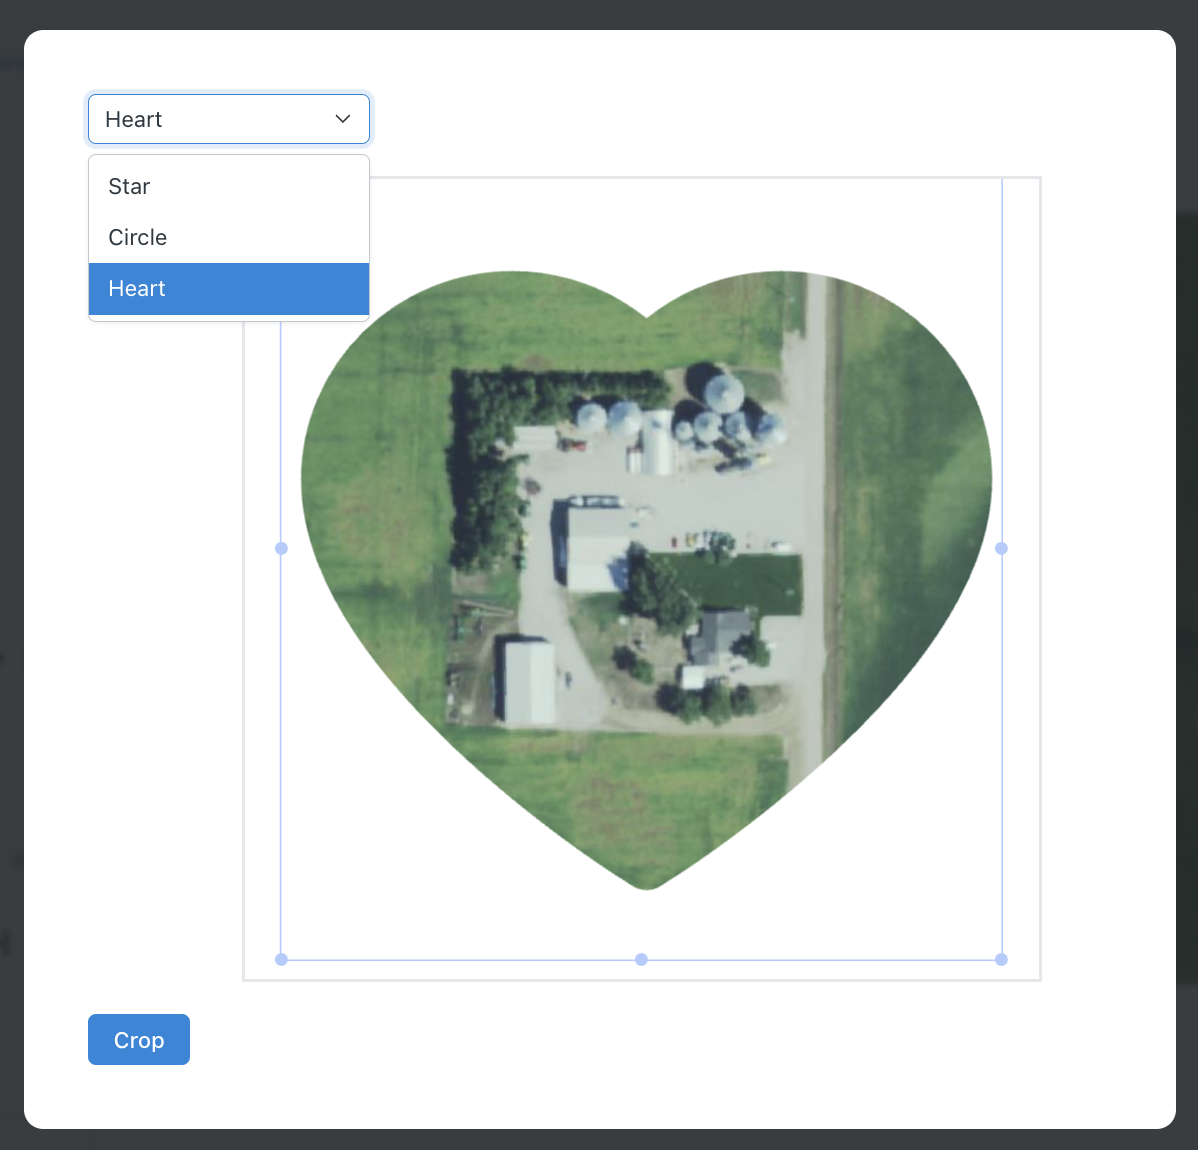
Editing the Shapes
Once you hit the Create Shape button, a new window will open so you can pick from the various shapes in the drop down.
You'll want to adjust the image position and can reduce or expand it as needed. Hit the Crop button at the bottom when you are ready.
Preview or Preview and Save
Once you have all the edits you want you can do 1 of 3 things.
- In the upper right you can Preview the product to get an idea of what it will look like while making other edits which looks similar to this pic on the left and toggle between different views.
- Name it and then you can Save and Continue and get the same Preview window, but with options to Add to Cart and go to the next step.
- You can Save as a Draft to edit it for later.

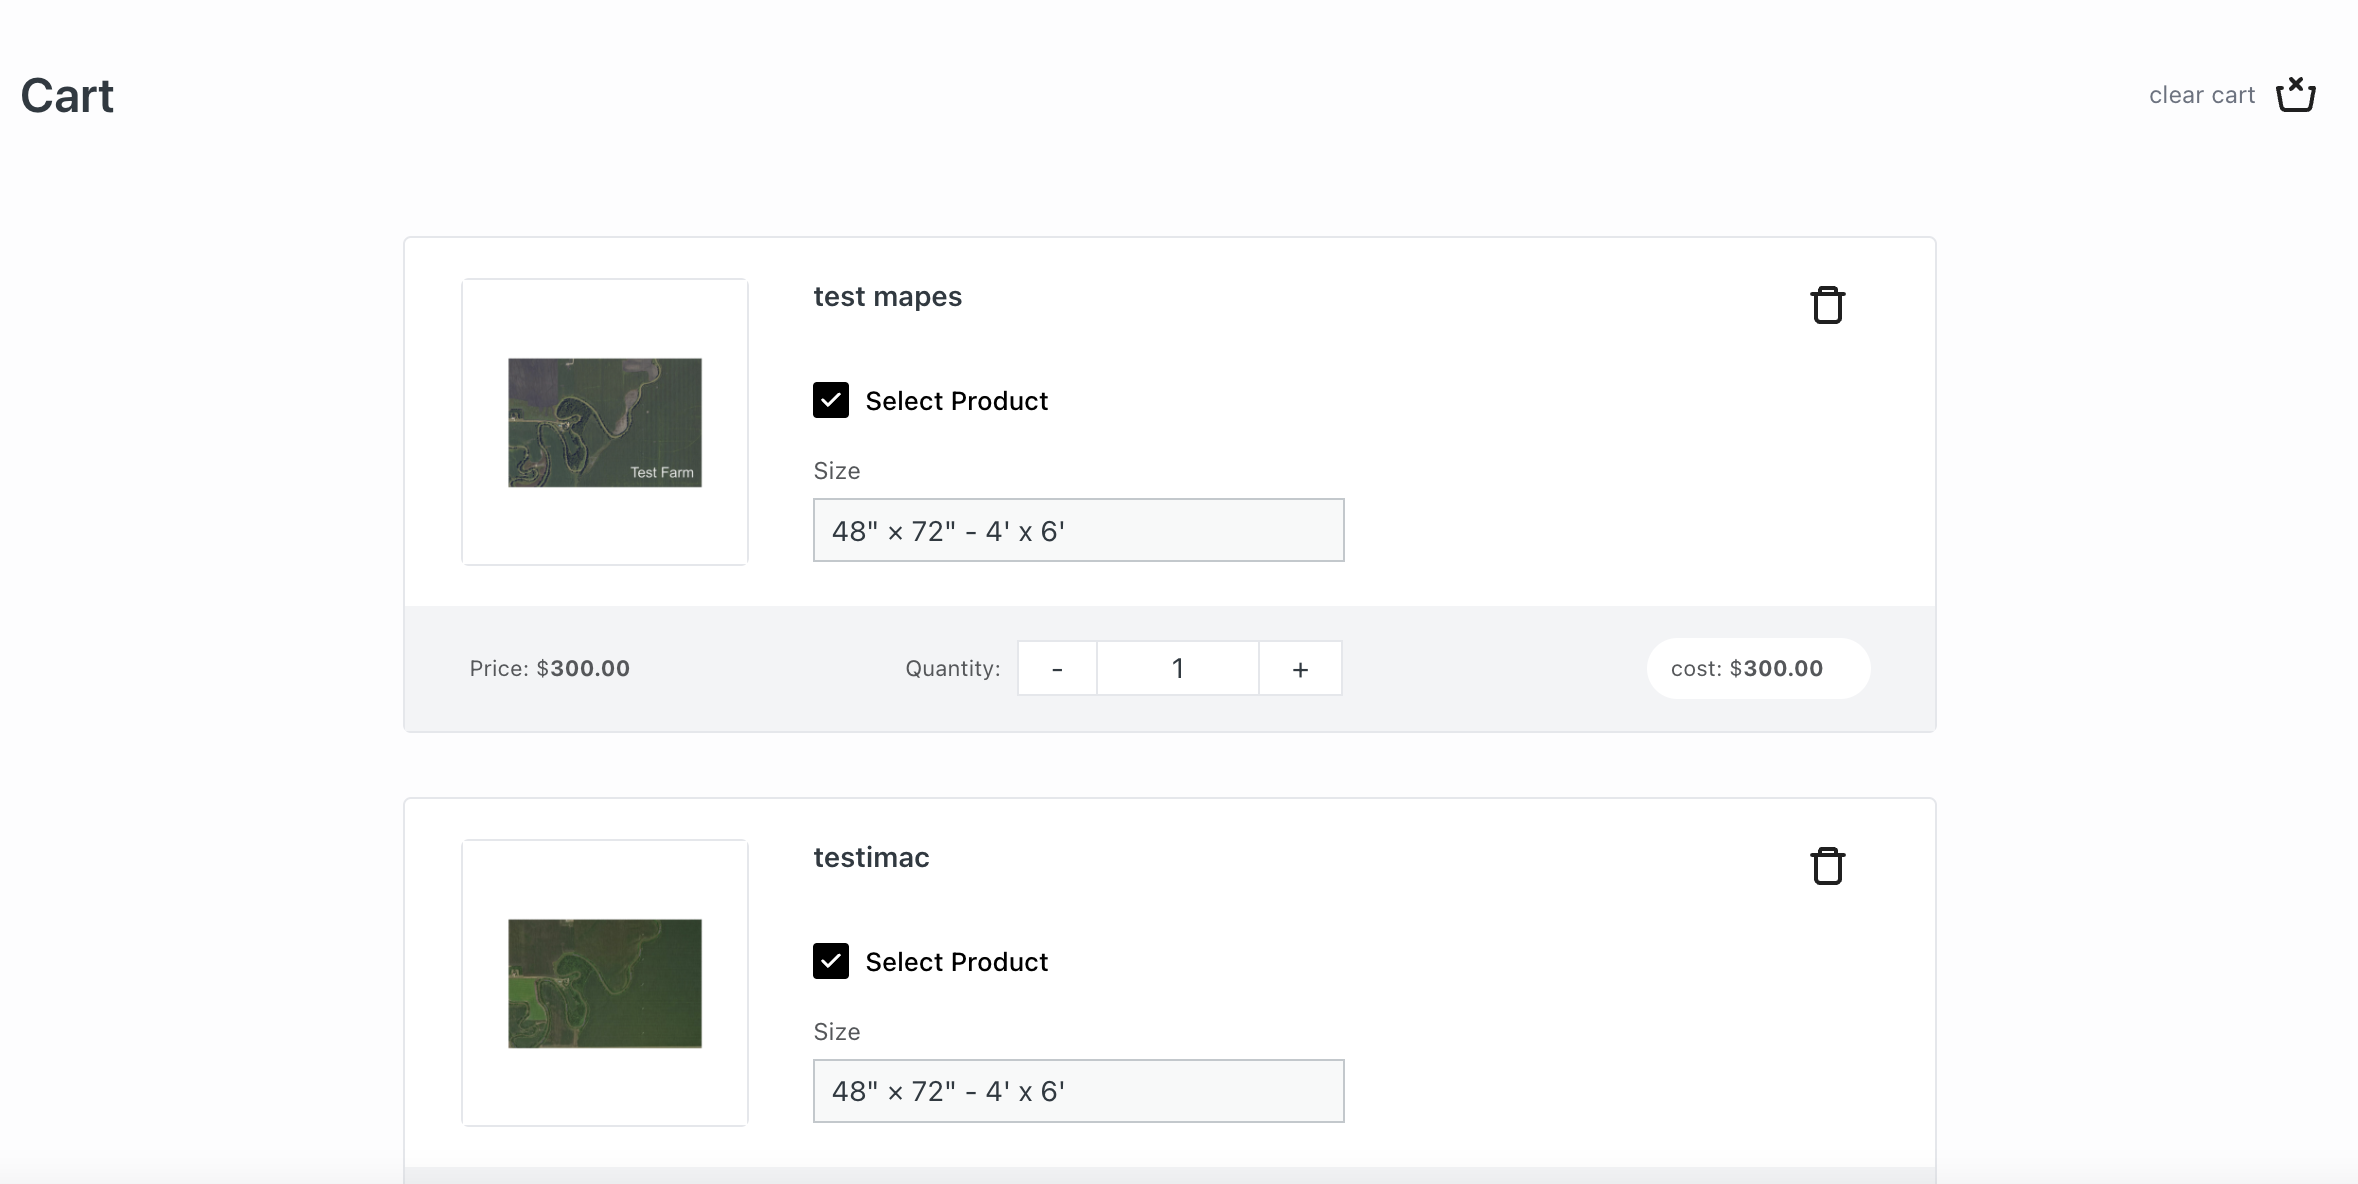
Product Cart
When you Save and Continue or Save as Draft and decide to Add to the Cart you'll get this page.
From here you can add more than one of the same product, add a whole other product to the order, or delete them as needed.
Payment Summary
Proceeding to Payments from the Cart gets you here where you can review the total cost of all products, save for later, or add the always important Promo code discount that may be available.

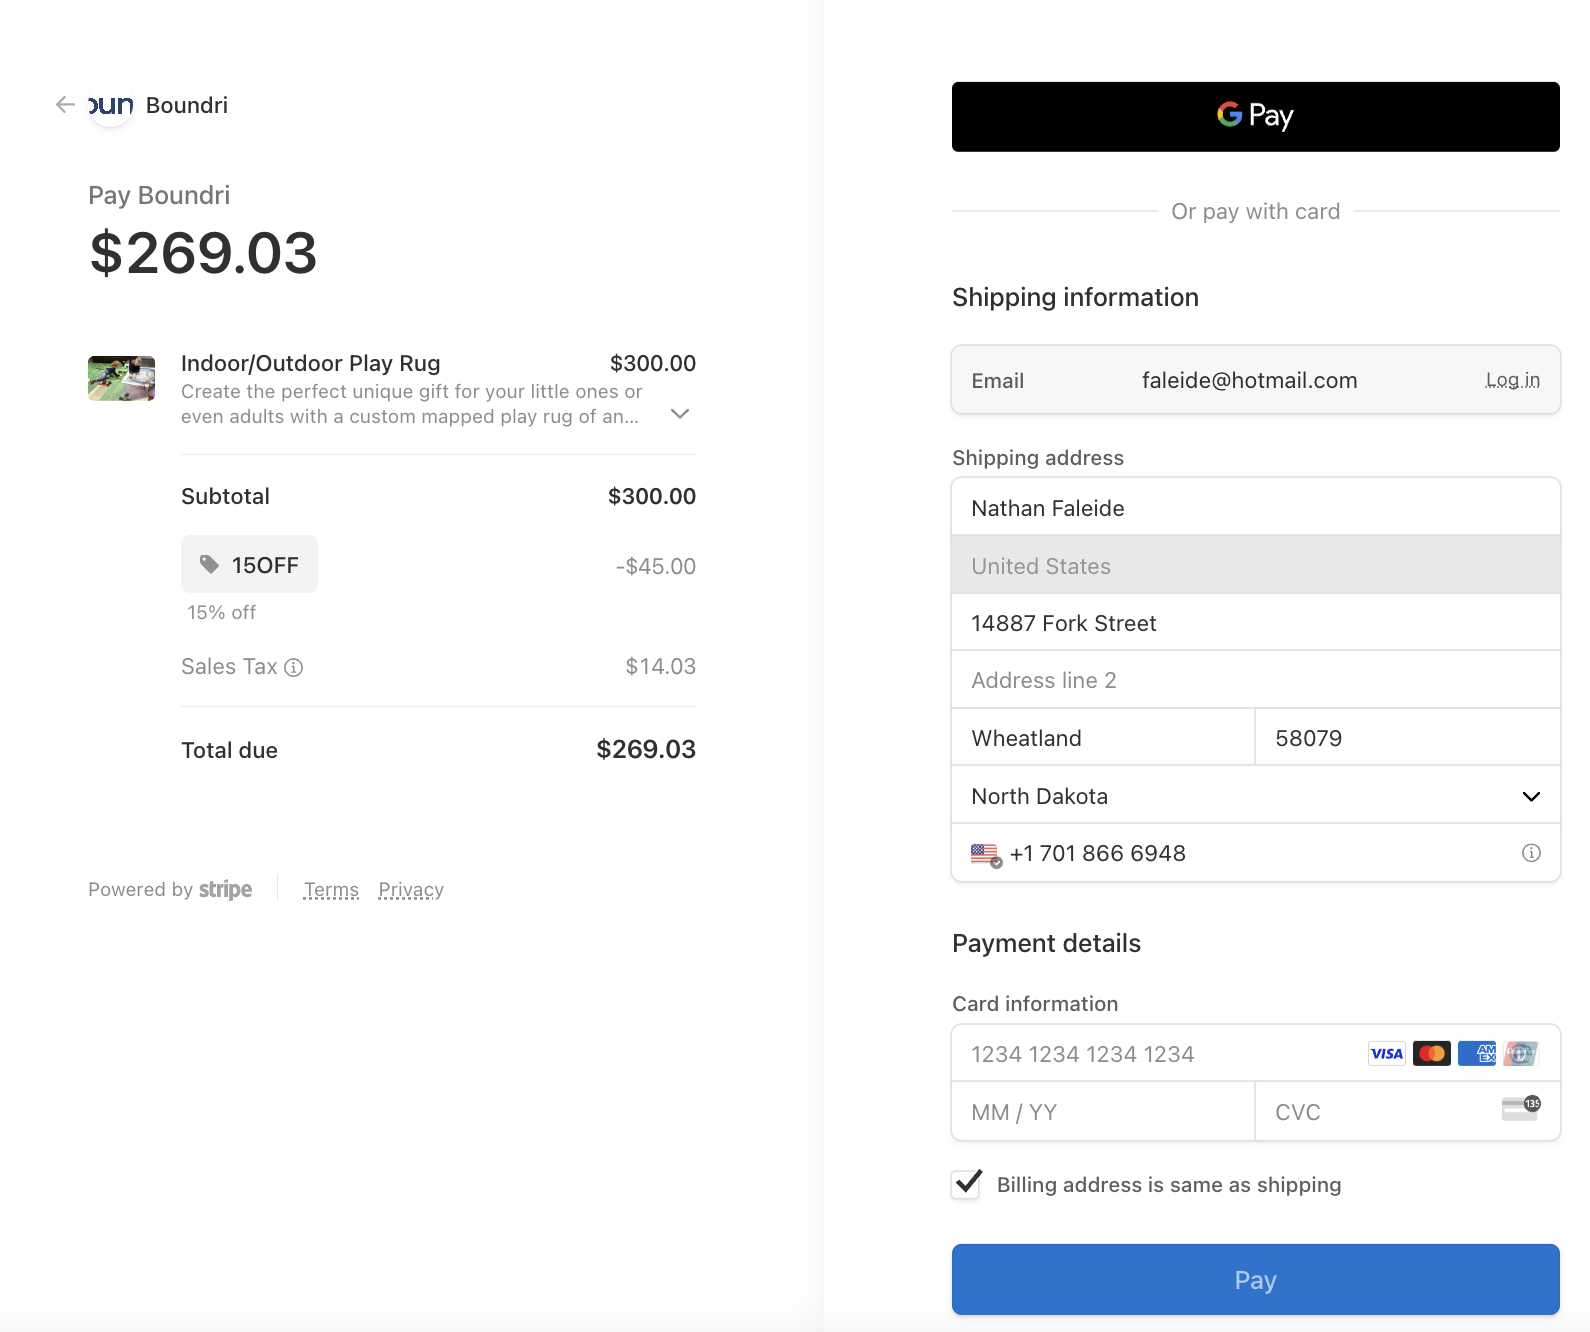
Payments Page
When you Proceed to Payments you come to our Stipe Powered page to add your name, address, phone, and payment as well as the shipping address that may be different from yours. There are multiple ways to pay.
You'll also see any discounts that you have plus any local tax that needs to be added based on your address.
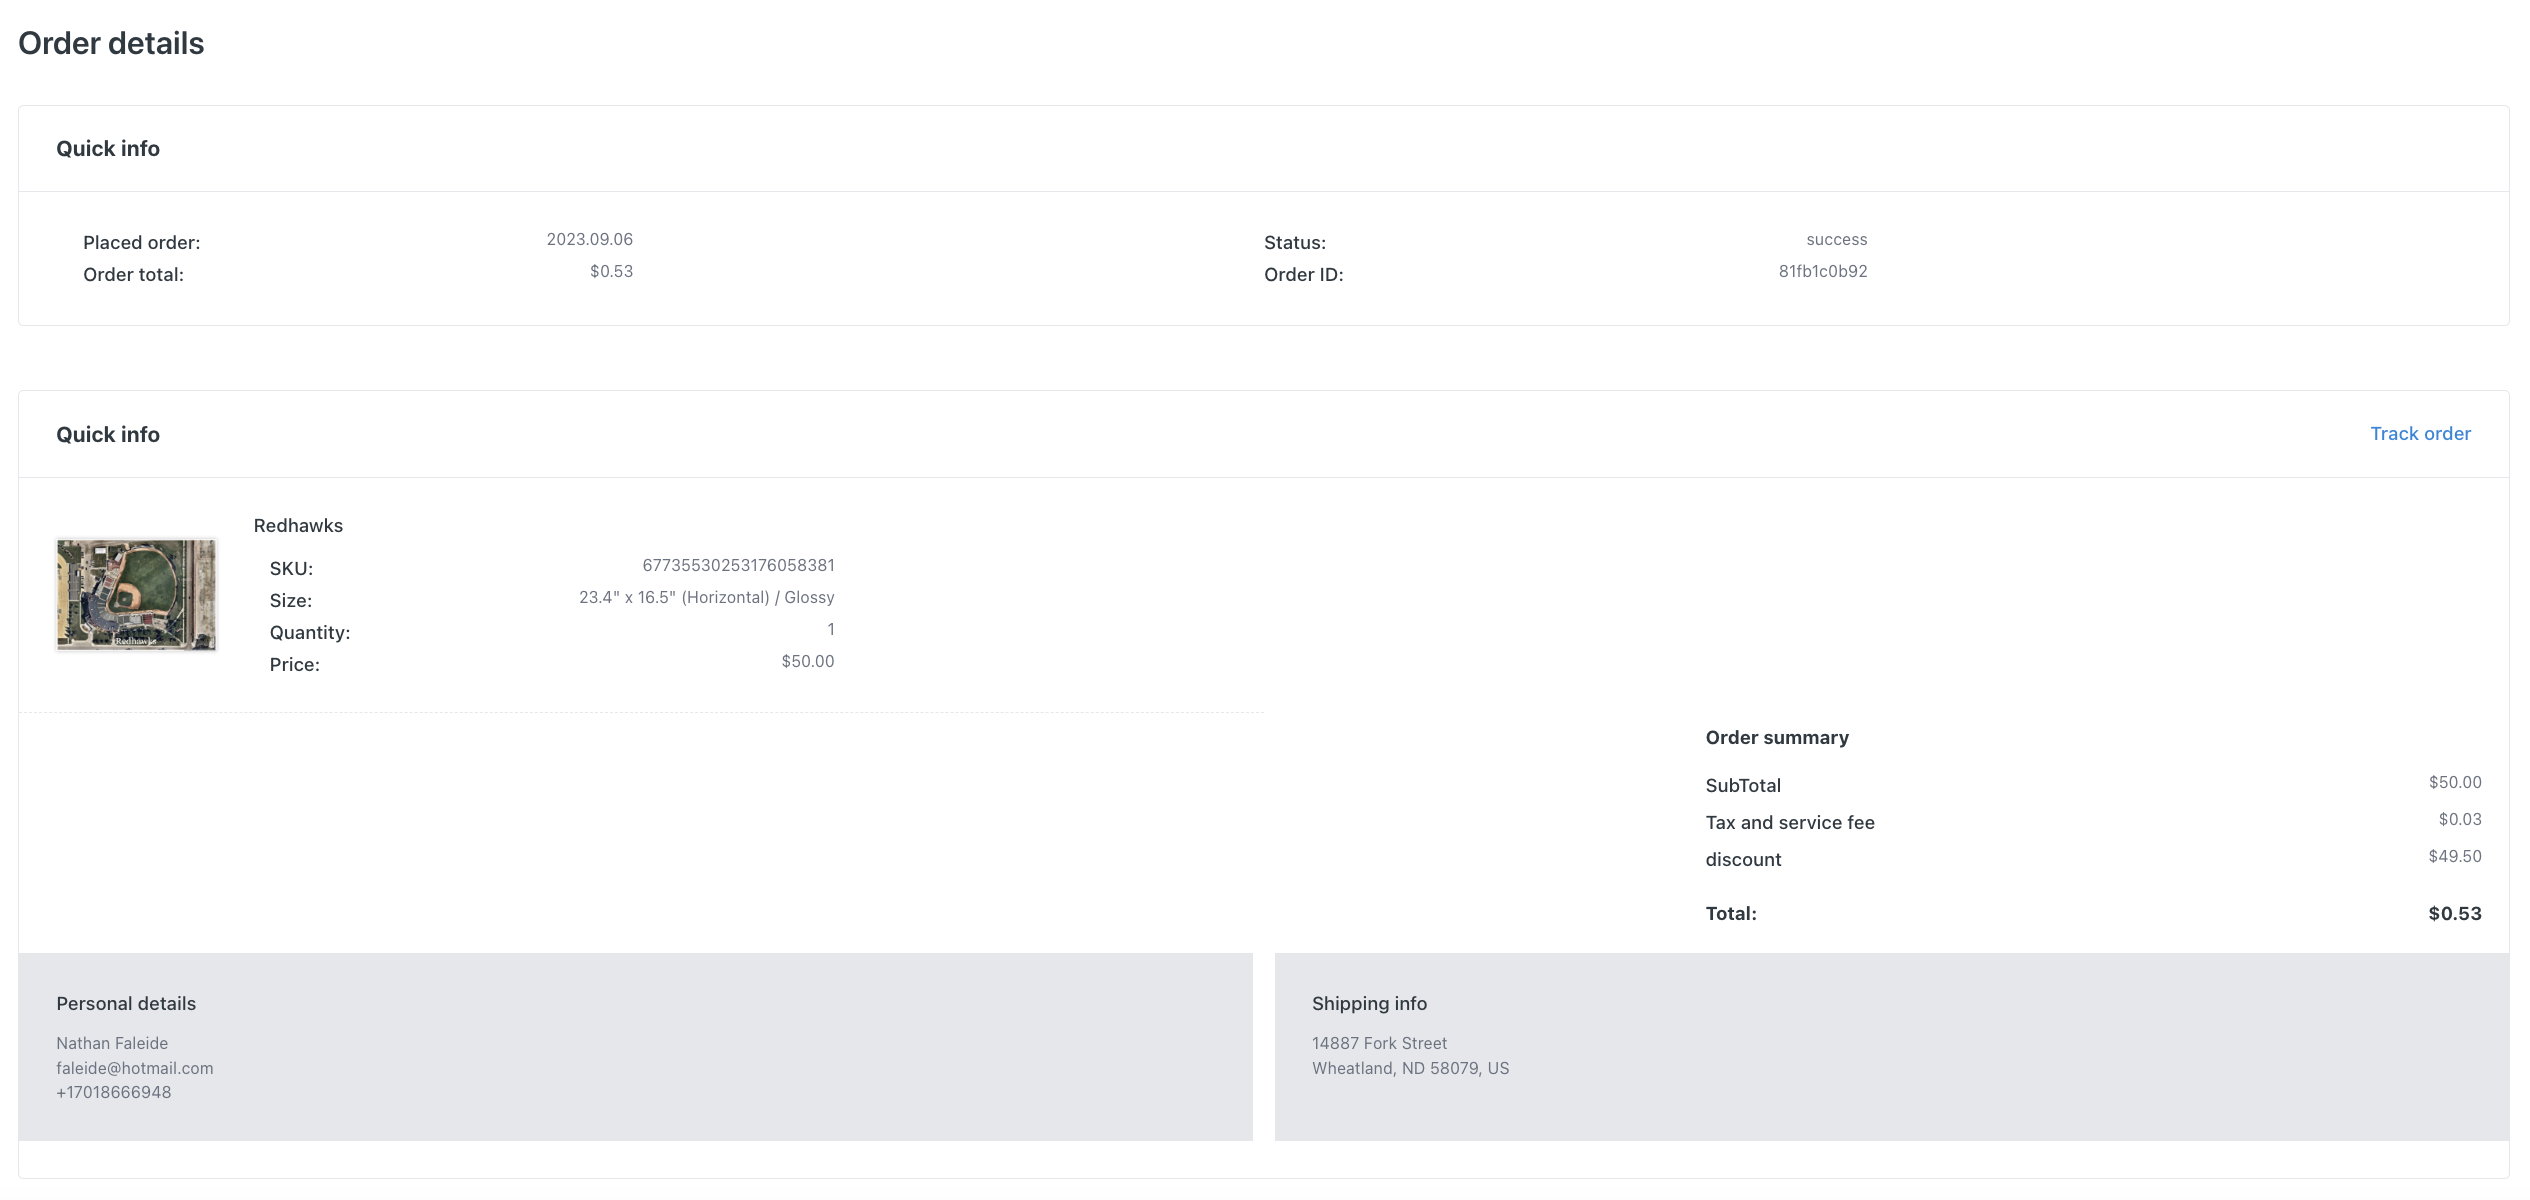
Order Details
This page option is available in the upper right account options, but also shows up as a link after your payment has done through from the payments page. You'll see SKU and Order Numbers plus your Shipping tracking number. It'll show the names and addresses you used as well.
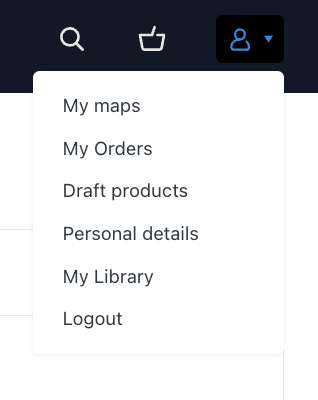
Other Items
There are other ways to locate your orders, draft products, saved maps, library items, and other account details to change or edit if you select the icon in the upper left of the window.
Congrats!
You've now gone through all the main steps needed to fully use our Product Builder mapping system! You are on your way to get one of the most unique and coolest printed items out there.
© Boundri